Podman Update Notifications via Ntfy
Table of Contents
For too long I have been manually running certain tasks on my server. This includes updating my Podman containers roughly once per week. For this, I have all of my containers set to run as systemd services which allows me to use the extremely helpful podman auto-update command. But I often use the --dry-run switch the first time to see which containers will actually have updates available for them.

Typical Podman auto-update output.
Instead of running this command only when I think about it, why not run it on a schedule? Easy… a cron job to run it weekly. But what about a notification?
A while back I started using Ntfy to get push notifications for some of my favorite apps like Element (matrix). But the services is extremely flexible. Why not incorporate other types of push notifications.
We can send all types of push notifications via Ntfy.
Background
The primary, tried-and-true-albeit-ancient solution to this problem has been to simply send yourself email notifications. This is fine for most people I guess. But I personally despise my inbox filling up with junk email and notifications. This keeps my email clean and only used for actually important messages.
So I started looking for a way to move notifications off to another service. For a while now I’ve been using my self-hosted Matrix server with a bot. This has worked relatively well. However, it is an involved process:
- Create a bot account on the Matrix server
- Create a room for specific notifications
- Using a tool like Matrix-commander, setup the bot on whatever server to send notifications from
- Write a script to send myself messages using the third-party tool
This is indeed VERY secure (end-to-end encrypted, etc.). But it’s also overkill, loaded with overhead, dependencies, and not really necessary for simple notifications. That being said, if you want true bot-like capabilities, it is an interesting route to pursue.
Ntfy
I was first introduced to Ntfy when I started using the F-Droid version of the Element app. While the background sync option worked fine, it tended to drain my battery and delay messages. It had been on my #TODO list for a long time. Once I set it up, I was surprised at how much else it did besides integrate into Matrix and Element.
https://docs.ntfy.sh/examples/
Notifications are as simple as sending a curl POST to a URL, and subscribing to that URL from a device. Literally it is that simple.
Overview
The goal here is simply to run the podman auto-update --dry-run command and send a notification to myself if there are any updates available.
While I can simply give you a code to copy and paste, it doesn’t really teach you anything, which is the point of my writing. If that’s not what you’re looking for, feel free to skip to the end.
Prerequisites
- Linux Server (really any distribution should work) - in this example, I’m using AlmaLinux 9.2
- Podman 2.+ (I’m using 4.4.1 here)
- Podman containers with their
systemdunits created and started - An ntfy instance up and running
If you’re coming from Docker, I wrote an article a while back explaining some of the aspects of switching to Podman on an Ubuntu machine. If you’re already running Podman, but haven’t setup the “auto-update” part, have a look at one of the later sections.
Plan
Before diving into any project, let’s make a small plan.
Podman auto-update output
I will begin by having a look at the output of the podman auto-update --dry-run command, and how we can use it to see if we have pending updates. We’ll want to pare down our list of containers to only show those that have an update available, and then cut down the information to just what we need.
There are a few ways to output the information, and I will cover some different ways depending on what you’re most comfortable with.
We’ll also have to consider what to do in case of an error or when no updates are actually available.
Ntfy
Afterwards, we’ll look at how we can get the information into an Ntfy notification in an reasonable manner.
Podman Auto-Update
Alright, let’s begin! First step is just to have a look at the output of the auto-update command. Since these specific images will be pulled from Docker Hub, I will want to be careful how many times I run the command before getting rate-limited. Thus, I will save the output to a temp file so we can play with it until we have something usable.
Note that there are 3 options here, pick your favorite and move onto the next section if the others bore you.
First look at the standard output
Running the podman auto-update --dry-run command is a bit slow as it has to check each image we are running against the repository images. To see the output in the terminal AND save to a file, we’ll pipe our output into the tee command:
podman auto-update --dry-run | tee auto-update-output.txt

Looks OK in the terminal, but not very friendly to send.
Well that isn’t the nicest thing to look at. But at least it gives us the information we want. We see the containers with updates available have the pending tag, while the others have the false tag. Let’s filter that a bit.
Grep to filter
The grep command is hugely useful, and can easily filter just the lines we are looking for.
Note:
For the next bit we’re simply going to be reading theauto-update-output.txtfile in place of running thepodmancommand to simulate the same procedure while we refine our process.
cat auto-update-output.txt | grep pending

Still not great, but filtering with grep makes it better.
OK, not bad. Now we could simply send each of those lines to our notification, but it would be a bit ugly and not so easy to parse if we are looking at the notification on a mobile screen for example. Let’s just grab the container names.
<Your Tool Here> to clean the output
Depending on your output, there are a few different places where we can grab the container name. I’ll be looking to get it from the values between the parentheses. This can be done multiple ways depending on your tool of choice:
sed:
sed -r 's/.*\((.*)\).*/\1/'
awk:
awk -F"[()]" '{print $2}'
grep:
grep -oP '\(\K[^)]+'
While perhaps it’s not the MOST intuitive, I’m more of a sed person myself. And while I’m at it, I’m going to cut out the first grep from above, and do it all inside of sed:
cat auto-update-output.txt | sed -rn 's/.*\((.*)\).*pending$/\1/p'
This isn’t a tutorial on
sed, but I’ll give a quick breakdown of what’s happening:
-r- Use extended regex (just makes more sense to me for using escape characters)-n- “Silent” mode (don’t print everything)'s/- Start of the “substitute” mode (because we only want the container name - we’ll substitute the entire line with just the container’s name that we will “find” within the line).*\((.*)\).*pending$- This is the regular expression which grabs and “tags” anything inside the parentheses for lines ending in the word “pending”/\1- Substitute everything in the previous statement above with our first “tag” (which is ideally the container name)/p'- print the results to the screen
And let’s add a little more polish to it:
cat auto-update-output.txt | \
  sed -rn 's/.*\((.*)\).*pending$/\1/p' | \
  sed -z 's/\n/, /g; s/, $/\n/'
-z- separate lines using NUL characters instead of new line characters (this lets us replace them)'s/\n/, /g;- substitute the new line characters with a comma and a space globallys/, $/\n/'- since we don’t want a comma and a space at the end, let’s remove it and put back the new line character.

sed is a very powerful tool for manipulating text quickly
Not bad! But perhaps there’s another way…
Output to JSON
JSON is one of the most popular ways to move data around, and the basis for most API’s. Thus, there already exist some amazing tools for reading and outputting the data like the tool jq. Also hugely powerful, take a look at the docs for more. So let’s begin by grabbing the same auto-update --dry-run output, but in a different format:
podman auto-update --dry-run --format json | \
  tee auto-update-output.json

JSON output, truncated for space.
Great! Like before, we’ll re-use the output by reading the file we created with tee.
Filtering and Cleaning with jq
Let’s start by passing the file into jq to see what we are looking at.
cat auto-update-output.json | jq

OK… the same thing but with pretty colors…
The first thing to note is that the JSON file is in an array. This is denoted by the very first and last square brackets [ ]. This means that each container’s information is a separate “node” within the list. This is great for us and makes filtering a breeze.
Let’s filter the output and clean it up:
cat auto-update-output.json | \
  jq -r 'map(select(.Updated =="pending").ContainerName) | join(", ")'

To me, this approach is the most logical.
Once again, this isn’t a guide on how to use
jq, but here’s an explanation of what’s happening:
-r- raw output switch (no “quotes” around the final output)'map((...).ContainerName)- themap()function takes each object in our JSON array, and applies a filter (see below) to each. The output is an array of the results. The ending.ContainerNametakes each item selected by our filter, and only passes that value to our new resulting array.select(.Updated =="pending")- our “filter” is to select the nodes that have the.Updatedfield matching the word “pending”| join(", ")'- pipe the resulting array into thejoin()function which will join all elements with a comma and a space.
…and what about an EVEN quicker way?!?!
Output to Go Template
We can do everything (almost) in a single command using Go Templating. However, there are two caveats here. First, I’m not sure of a way to output it into a temp file that we can practice manipulating. Second, I’m no expert in Go templates and couldn’t find an easy way to keep it all 100% self-contained - I used sed again to clean up the final formatting.
Where to start?
Since we don’t have an output we can play with, you might have to refer to the documentation https://docs.podman.io/en/latest/markdown/podman-auto-update.1.html#format-format to get an idea of what’s possible for values. Beyond that, have a look at the templating docs (linked above) for other possible functions to use.
podman auto-update --dry-run \
  --format '{{ if (.Updated | eq "pending") }}{{ .ContainerName }},{{ end -}}'
Let’s look at what’s happening in the command above.
{{ if (.Updated | eq "pending") }}- a simple “if” statement. If the.Updatedfield is equal to “pending”, we will do the following. Otherwise, do nothing.{{ .ContainerName }},- print the name of the container followed by a comma{{ end -}}- The end of the “if” statement. Note the minus sign (-) at the end. This trims all trailing white space (including new line characters). Without this, we get a blank line for any containers who are not “pending” updates. A bit annoying…
Polish with sed
And finally, a bit of polish. If anyone is an expert in Go Template string formatting, give me a shout in the comments below and I’ll update this section!
podman auto-update --dry-run \
  --format '{{ if (.Updated | eq "pending") }}{{ .ContainerName }},{{ end -}}' | \
  sed 's/,/, /g; s/, $/\n/'`
A quick breakdown of the
sedsection:
s/,/, /g- substitute all commas with a comma and a space (since we don’t have spaces from the first command due to the (-) at the end of the previous command)s/, $/\n/- substitute the final comma and space with a newline character.

OK, so not as quick or clean as I was hoping for.
Well a few options for you. Time to (finally!) send it to our Ntfy notifications.
Ntfy
Rest assured, this section will be shorter.
Sending notifications to Ntfy is simple. I prefer to use the simple curl command, but there are many options available to you if you’d like to use something different.
Start with a test
If you’re not familiar with Ntfy, let’s do a quick test to ensure it’s working:
curl --insecure -H 'Title: Test' -d 'foo bar' https://ntfy.test.com/test
- I am using the
--insecureswitch here because I am in a test environment without a real TLS certificate. Discard if you’re using with a real domain name.- The
-H 'Title: Test'section adds a request header which adds the title to the notification. Totally optional.-d 'foo bar'is the actual “data”, and also changescurlto use aPOST(send data) instead of aGET(receive data)https://ntfy.test.com/testis the endpoint. The/testend of the URL doesn’t even need to exist yet (depending on your Ntfy settings)
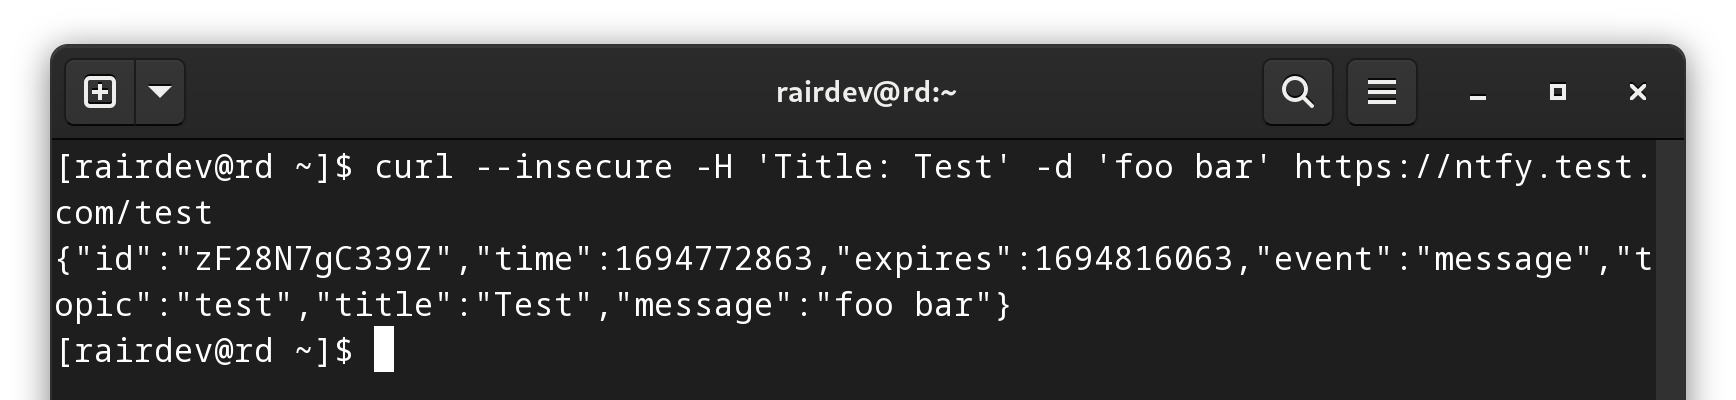
Notification sent, and we received some feedback from the server as well.
Looking at the web interface, we can see the test has come through. We subscribe to the topic, and now everything shows up. This works the same for the mobile version of the app.
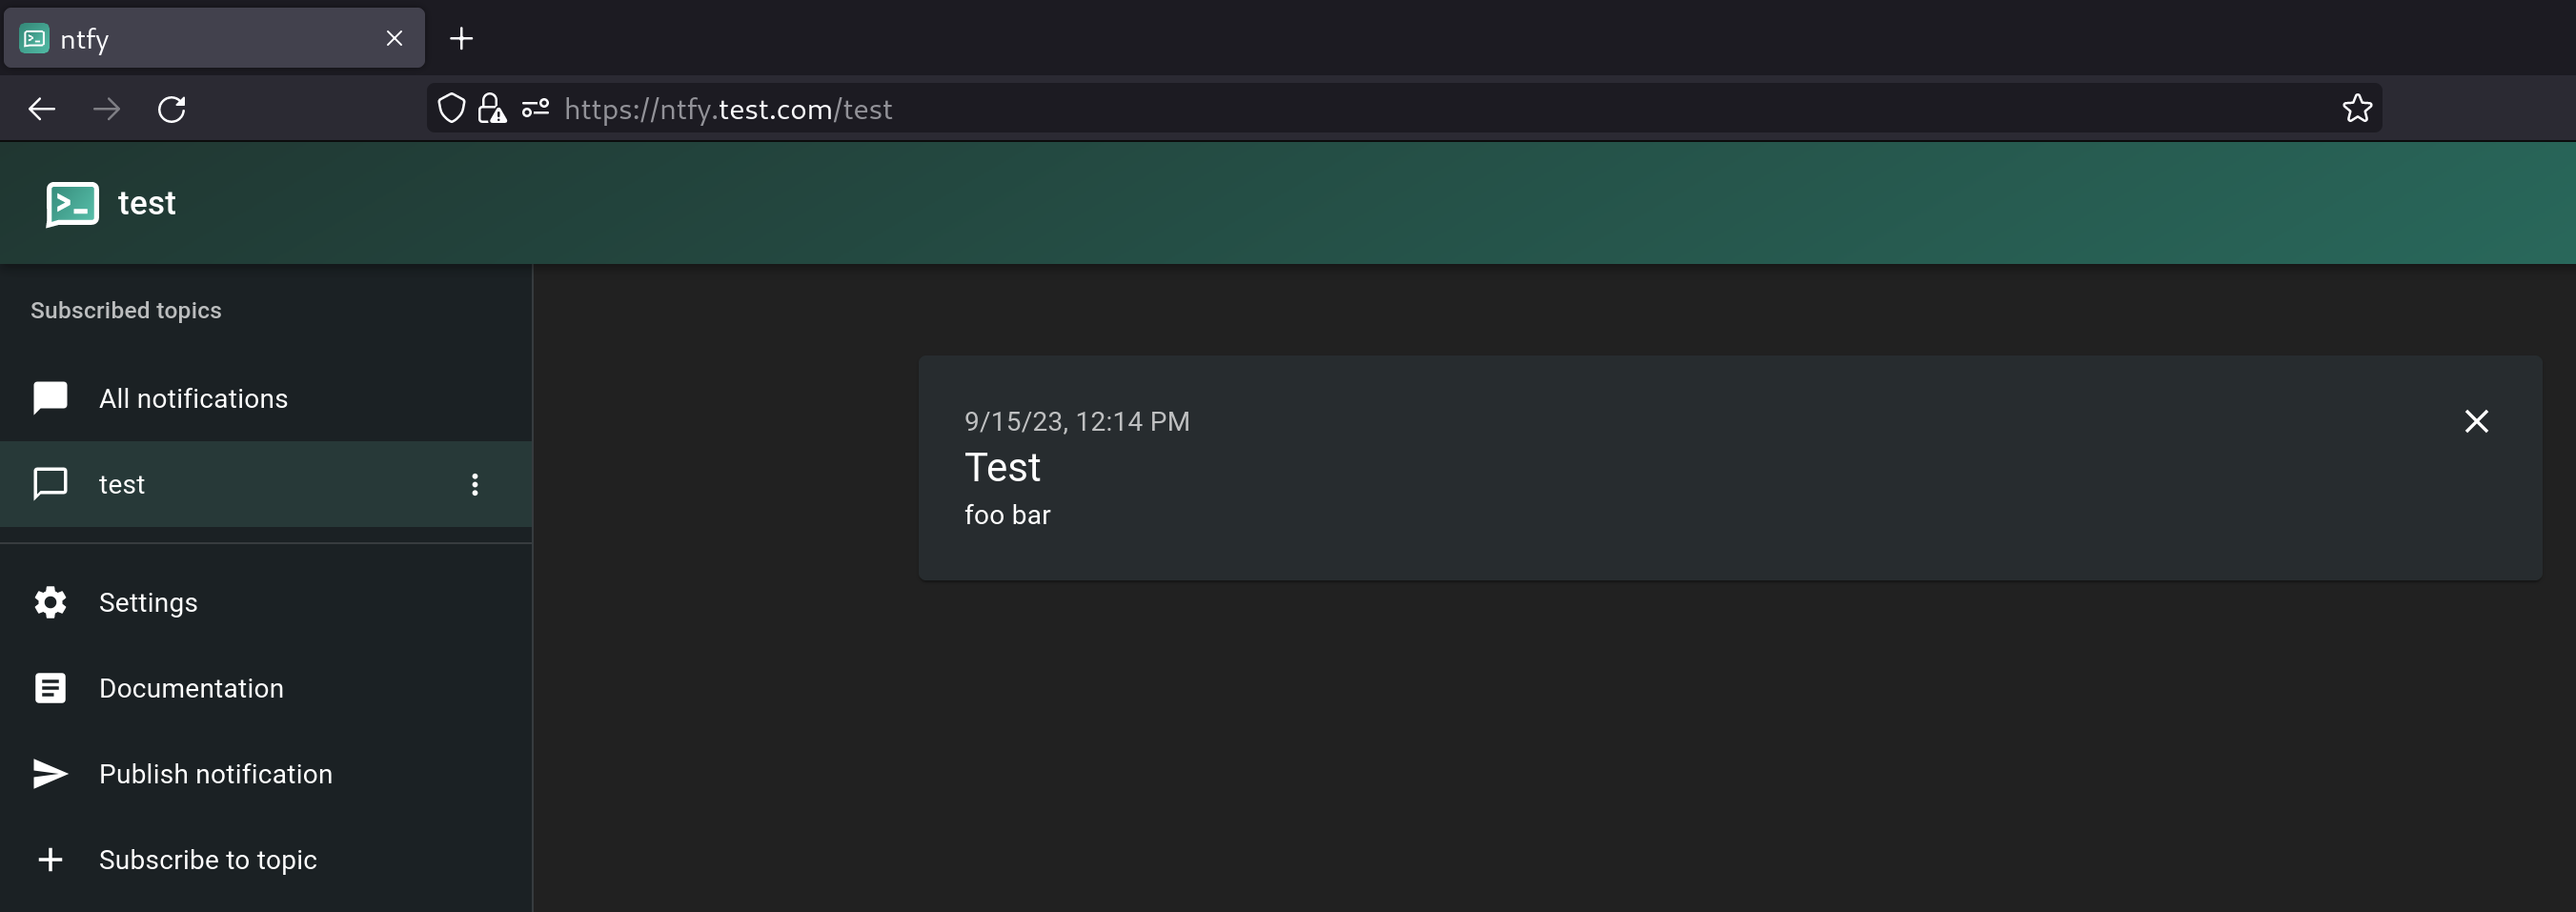
Notifications come in instantly after subscribing to the topic on the left.
Send our update notification
So, let’s tie it all together and send an update notification to Ntfy. Personally, I prefer the JSON method, so I will use that here. But do what you’re comfortable with.
Note:
If you are still testing, continue to use thecat <filename> |method even here, and only replace it with the realpodman auto-update --dry-runcommand when you’re ready!
podman auto-update --dry-run --format json | \
  jq -r 'map(select(.Updated =="pending").ContainerName) | join(", ")' | \
  curl -H 'Title: Container Updates available!' -d @- https://ntfy.test.com/test
Note:
To “pipe” the output of ourjqcommand into the correct part of thecurlcommand, we use@-to denotestdin(the information from the previous command).
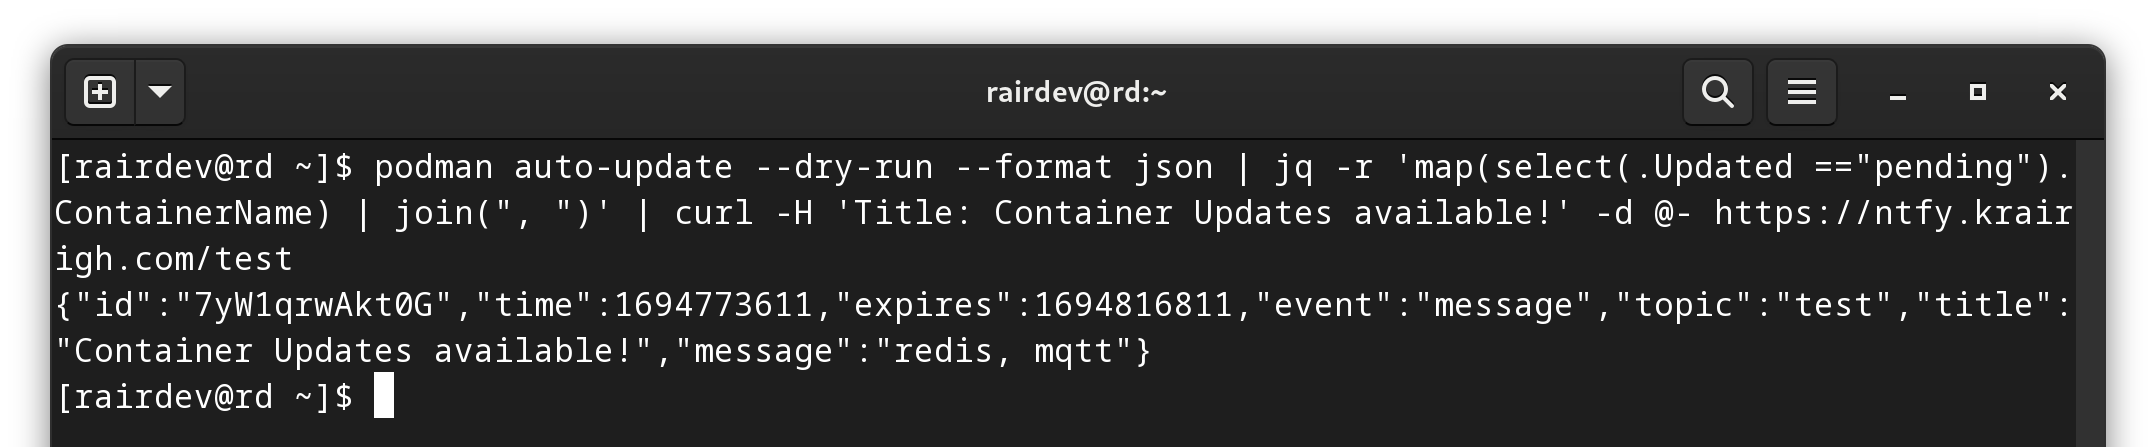
Notification sent from our refined JSON output.
And I even got a desktop notification!
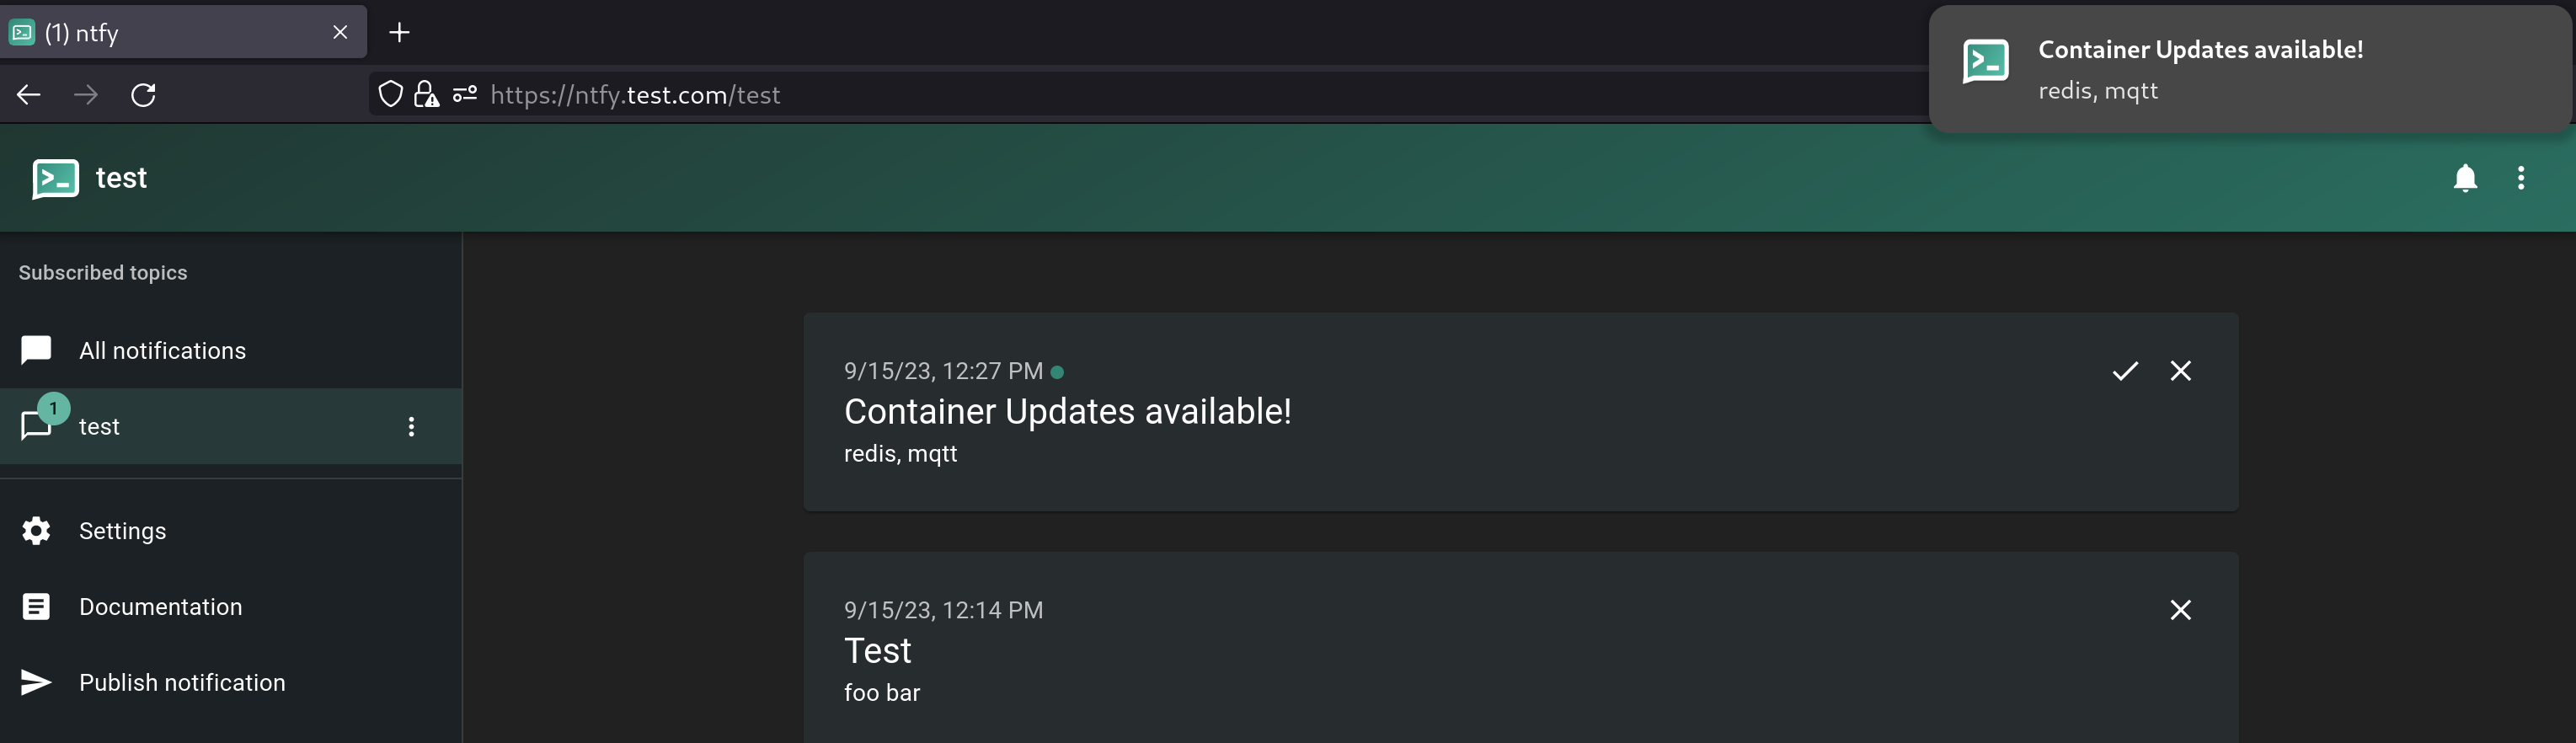
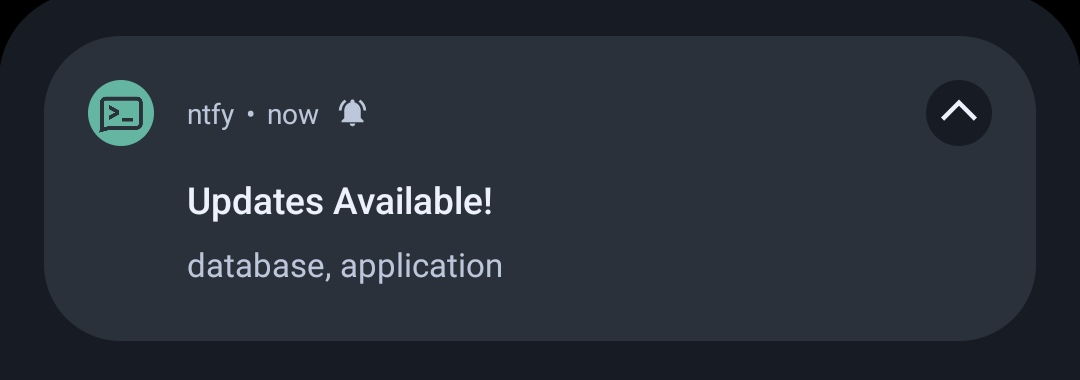
Looking good. See the beginning of the post for an example of the Android notification.
Cool! Now a final test…
Exploring all possibilities
So, the command works wonderfully if we have some updates available. But what happens if we have no updates available? I edited my auto-update-output.json to change the “pending” entries to “false” for this test.

A notification was still sent, even with no updates available.

An empty notification doesn’t stop curl from firing.
Hmmmm well that’s not super useful…
I explored a few options, but since I intend to run this operation as a cron job anyways, we can easily create a small check within a bash shell script.
Looking at the different methods mentioned above, when no update is available, they either output an empty response, or give an error. Perfect.
Build the script
I’ll start by simply copying and pasting the above command into a new script I’ll call update-check-podman.sh
#!/bin/bash

set -e

podman auto-update --dry-run --format json | jq -r 'map(select(.Updated =="pending").ContainerName) | join(", ")' | curl -H 'Title: Container Updates available!' -d @- https://ntfy.test.com/test
From what I learned above, I just need to add a test to see if the output of the first half of the command is empty or not. I’ll save the output in a variable, and test it after. While I’m at it, I will use Ntfy’s “priority” setting to modify how I’ll be notified.
The reworked script looks like:
#!/bin/bash

set -e

updates=$(podman auto-update --dry-run --format json | \
          jq -r 'map(select(.Updated =="pending").ContainerName) | join(", ")')

if ! [[ -z "$updates" ]]; then
  curl --insecure -H prio:3 -H 'Title: Container Updates available!' -d "${updates}" https://ntfy.test.com/test
else
  curl --insecure -H prio:2 -H 'Title: No Container Updates' -d "Hooray!" https://ntfy.test.com/test
fi
I’ll save that file, make it executable with
chmod u+x update-check-podman.sh

Giving the script a test run before making it a regular cron job.
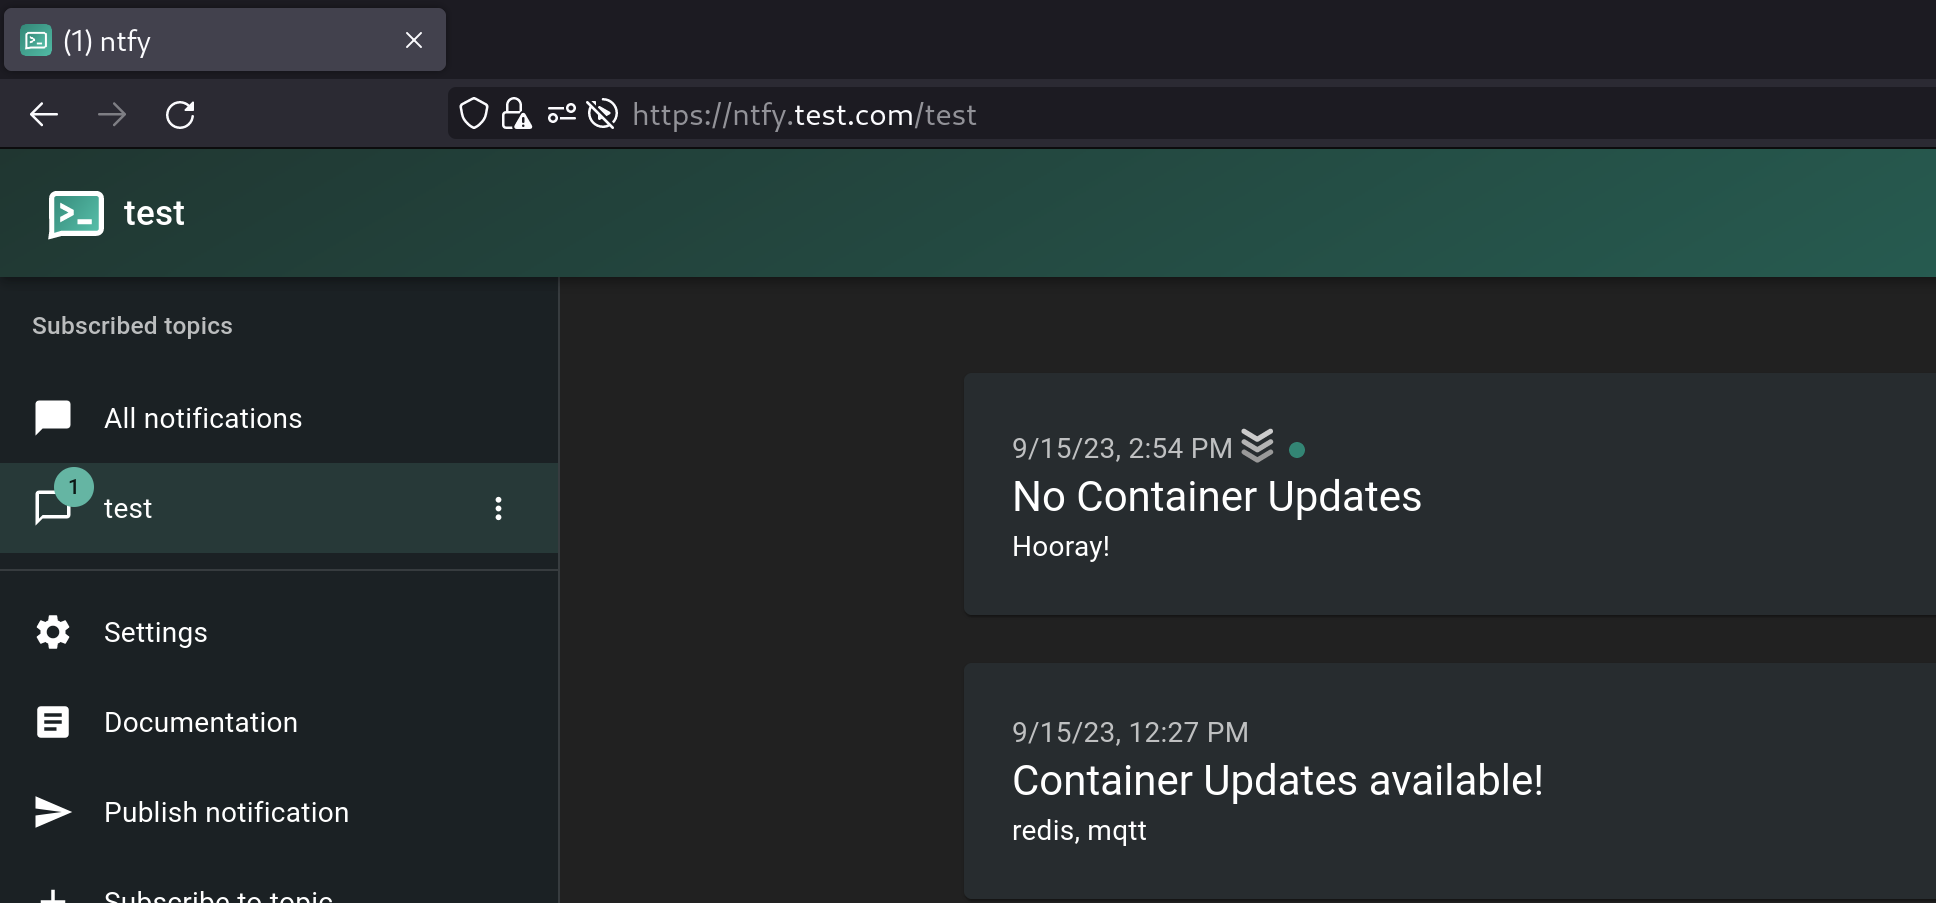
The notification went through as expected.
and finally add it to a cron job to run each Friday morning:
crontab -e
0 9 * * 5 /home/rairdev/update-check-podman.sh
A Few Notes
Security
In this example, I’m running Ntfy in a naked environment. If you intend to send your self notifications via a publicly accessible endpoint, it might be a good idea to setup some type of access control, IP address filtering, or even an authorization point in your reverse proxy.
Looking for more?
If this seems a bit trivial, take it a step further!
Check out the options including clickable actions, icons, etc.
- Run the actual update, and send different notifications if successful or failed/rolled-back
- For each container with an available update, see if it’s a point release, or a major release
- Add a link to the changelog in your notification
- Search the change log for “breaking changes”
- Create a listener to monitor the ntfy feed, and allow you to send a reply notification which triggers the actual auto-update.
Troubleshooting
If you’re having trouble with your podman auto-update command, make sure that your systemd units are created correctly. You can always recreate the unit files and do a systemd --user daemon-reload to use the new unit files.
If the trouble is coming from a command line tool, you’ll likely have to look at your formatting, or check the error code that it spits out.
Finally, Ntfy has some troubleshooting tips in the documentation as well.
Conclusion
I had been putting off notifications for a while because each time I wanted to set them up it turned a small project into a large one. I am so excited to use Ntfy for more than just the UnifiedPush aspect. I never realized just how easy it was and how powerful at the same time!
My next step is to dig into the clickable actions dialogues! Perhaps a second follow-up article will be in store?
I hope you found this article helpful. Any comments, questions, or suggestions are welcome in the comment section below!