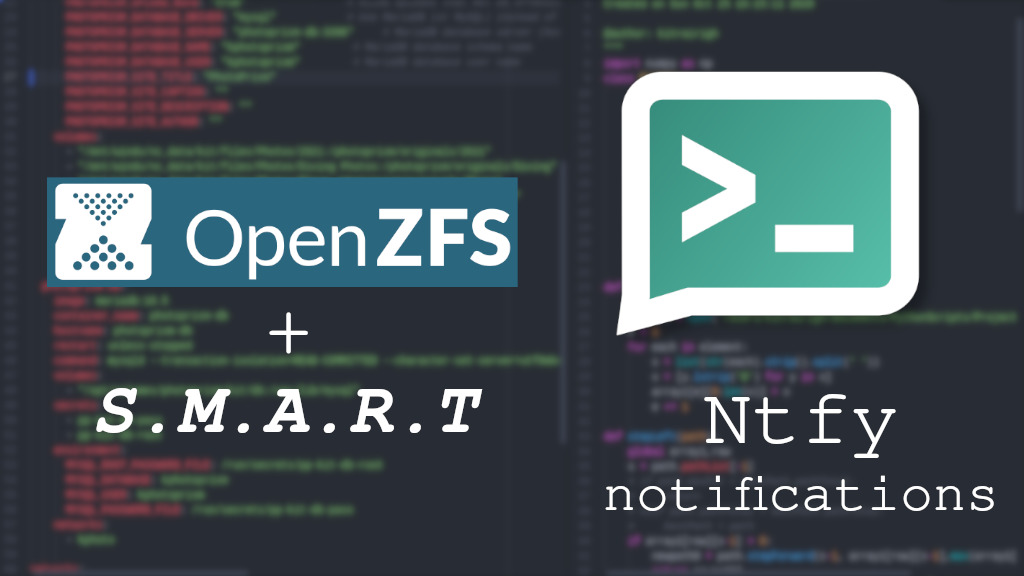
ZFS and SMART Warnings via Ntfy
Table of Contents
Ntfy is becoming one of my favorite self-hosted services, and now I’m finally integrating it into system monitoring. I finally have enough drives to run a couple of ZFS mirrors, and wanted to be notified of any problems with the drives. As a bonus, I also found the notifications for SMART statistics and decided to add that as well.

Notifications can be to a desktop app or smartphone.
In one of my previous articles, I discussed using Ntfy as a way to give me little notifications if I have Podman containers to update. That was more involved in processing the information to send, where this article is about getting the two aforementioned programs to play nicely with a simple curl command.
Background
As stated in my other Ntfy article, these types of operations are traditionally done with simple emails. Both of the programs are already setup to use email services. Frankly, I’m email-fatigued and have cut down on all the spam tremendously to minimize the number of new mails per day. My inbox is my temple. I don’t need these notifications there.

If you are still reading this article, I suspect you are in a similar boat.
So why am I going to all this trouble? Why not just use a simple, integrated system like TrueNas Scale or otherwise? Maybe I’m just a technology masochist. Or, I like the simplicity of learning new things, and keeping my system lean. Maybe I’ll create a post on how much I’ve been able to run on my relatively minimal hardware. But that’s for another post.
For a little more of my take on Ntfy, check out the intro of my previous post linked above.
ZFS and smartmontools both have robust, built-in notification systems that I can leverage into my notification system. The trick is that (in their current states) neither have direct support for Ntfy. However, both are nearly there.
Ntfy
As this article isn’t about setting up Ntfy, I’ll skim over this part. You should already have an instance running, or be willing to use the public https://ntfy.sh site. If using a publicly accessible version, you might want to use a random topic name or at least protect it with an access control or token.
If you’re not familiar with Ntfy, we will be posting to a “topic” URL, via a curl command. Example:
curl -d "test" http://192.168.122.198/zfs

A basic curl command is all it takes!

The result of our basic test.
ZFS notifications via zed
NOTE:
Support for Ntfy notifications viazedhas been officially released in v2.2.3. My AlmaLinux 9 box is now on 2.1.15, so for now you’ll still need to add it as described in the article until you are on 2.2.3+.
ZFS notifications are handled by a system daemon called zed (AKA the ZFS Event Daemon). There’s no need to go into detail here. The daemon monitors events generated by the ZFS kernel module. For example if you are getting errors on your pool.

We can see all kinds of events from ZFS.
This daemon tracks all events, but in our case we are only interested in getting notifications about errors. More on this later.
Digging further into ZFS notifications, I was a bit disappointed there was not a way to simply add a shell script for it to execute instead of sending an email. But upon further inspection, I saw other notification services, including Pushbullet, a Slack webhook, etc. Surely, this meant it was possible to run a simple curl command.

Looking at the way these other notifications work, zed calls a simple shell script which pulls in variables from an .rc file (akin to .bashrc for you Linux nerds out there). Turns out, these other notification services are already using a curl command to make them work, thus, adding one for Ntfy should be trivial. Fortunately, for us poor souls, someone already put in the pull request to add this very functionality!
ZFS has a commit from December 2023 adding Ntfy support, but it hasn’t made it into a release at the time of writing this article. Fortunately, the change is only to the above two files, which we can easily and safely put into use directly.
SMART notifications
If you’ve ever used smartctl to look at a drive’s health, you are familiar with the amount of information a drive can give you.

A part of the SMART info output.
Something you may not know is that there’s also a SMART daemon, smartd, running in the background which regularly monitors the health of your drives (that report SMART health) and can notify you of problems.
The default notification system can be… manipulated… into running a shell script instead of sending an email. So we will write a small shell script to use our curl command.
Overview
For this, I’m running 2 VM’s on my machine: one with Ntfy listening on port 80, and the other with ZFS and a couple of virtual drives as my ZFS mirror - devices /dev/vdb and /dev/vdc. Note that these could just as well be the same system, but this is just a bit simpler for the article. I also won’t have access to any direct SMART information since the VM isn’t using real drives.

The virtual drives will work wonderfully for this ZFS test.
Prerequisites
- Linux Server (really any distribution should work) - in this example, I’m using AlmaLinux 9.3
- ZFS (using version 2.1.14 here)
- SMART Monitoring Tools (using
smartmontoolsversion 7.2 here) - An ntfy instance up and running
Plan
Before diving into any project, let’s make a small plan.
- Ensure Ntfy is receiving notifications at our desired topic (see above). ✅
- Add Ntfy notification capabilities to ZFS via their GitHub.
- Create a small shell script to add Ntfy notifications to the SMART Monitor Daemon.
Adding ZFS notifications
As noted above, there’s a recent commit from user slash2314 that adds this functionality and is easily available to us without needing to build ZFS from source or any other such nonsense!
Backup original files
In AlmaLinux 9, the files are located in the /etc/zfs/zed.d/ directory. The two files are zed-functions.sh and zed.rc.
sudo cp /etc/zfs/zed.d/zed-functions.sh /etc/zfs/zed.d/zed-functions.sh.bak
sudo cp /etc/zfs/zed.d/zed.rc /etc/zfs/zed.d/zed.rc.bak
We are making a simple backup by copying our current versions of the files to a
.bakextension. If everything goes poorly, you can alwaysmvthis backed-up version to the original name.If you skipped this step and have REALLY gotten yourself into trouble, you can simply
dnf reinstall zfsto get the original files from the ZFS repository.
Get new files
Next, we’ll need the new version of the above files. I give you two options. Choose one.
Download new files directly (quick and dirty)
Generally speaking, there shouldn’t be an issue with the newest version of these files, unless there’s a typo/bug in them.
curl -O https://github.com/openzfs/zfs/blob/master/cmd/zed/zed.d/zed-functions.sh
curl -O https://github.com/openzfs/zfs/blob/master/cmd/zed/zed.d/zed.rc

Nothing interesting to see here.
If this doesn’t work, or you just want to verify there are no conflicts, follow the section below instead. Otherwise, move on to moving the files.
Patch files with Git (better method)
I’m no Git guru, but this is probably a better practice to ensure we don’t screw up something as critical as our ZFS installation. As I noted above, we don’t have to rebuild anything, but this method should reduce chances of error. If I am misusing Git or there’s a better way, please feel free to shame me in the comments section at the end of the article!
So in this scenario we’ll start with our current version of ZFS as the base, and cherry-pick the commit with the fix for our 2 zed files above. The key here is that we will be selecting the same “tag” as our current release, and then patching it with the pull request linked above.
Note:
The following assumes your Linux distribution hasn’t modified the ZFS package in a significant way from what was released via GitHub. Again, what we are changing should have 0 effect on the function of ZFS. But I won’t be held responsible if you borked something. You’ve been warned.
Clone the ZFS repo
git clone https://github.com/openzfs/zfs

Attack of the (Git) clones.
Switch to YOUR version
I am using zfs version 2.1.14 as can be seen with the following command:
zfs version

If your version is > 2.2.2, check if Ntfy notifications are not already included!
To find the list of tags we can use, either head to the GitHub page at https://github.com/openzfs/zfs/tags, or:
git tag --list
We will use git switch to get into the correct commit.
cd zfs
git switch --detach zfs-2.1.14
Note that we’re using the --detach flag to checkout the commit at this point in time. This simply means we aren’t on a “branch” anymore, and instead are looking at things in a specific point in time.
Add Remote Repository
Since this “feature” was added as a fork of the original ZFS repository, we’ll add the remote fork to allow us to grab the specific “commit”.
git remote add fork https://github.com/slash2314/zfs/
git fetch fork

Remember to ‘fetch’ the fork after adding it to add the contents to our local repo.
Cherry-pick the correct commit
Let’s make sure we have the correct commit:
git log fork/master

We can see in the commit message that this is the addition for Ntfy.
Great, we want the first commit listed talking about Ntfy integration.
git cherry-pick ed1dc2bdeb45493995efcc01093b8fccba996a74

Tooooo easy, no conflicts!
Done!
You can ignore the bits below about not setting a committer identity as we are just grabbing the files for local use, not pushing anything to the ZFS repository.
Below the committer identity, you can see I ran another command:grep. I simply wanted to see if git complaining about the committer identity had exited the merging process. In fact, it did not. The merge occurred correctly and we can see the Ntfy settings within the file.grepis a simple but powerful tool you should have in your troubleshooting toolbox!
Change directory to the file location
To follow along with the next step, cd into the directory with the two patched files.
cd cmd/zed/zed.d/
Move the new files
Now that we have our new versions, let’s move them into place.
sudo cp ./zed-functions.sh /etc/zfs/zed.d/zed-functions.sh
sudo cp ./zed.rc /etc/zfs/zed.d/zed.rc

Since we made a backup, we can overwrite the original files.
Finally, double check your permissions (and SELinux labels while we’re at it) with:
ls -lZ /etc/zfs/zed.d/zed*

The permissions are already set correctly and match the old files.
If your permissions are not correct, modify them with:
sudo chmod 0644 /etc/zfs/zed.d/zed-functions.sh
sudo chmod 0600 /etc/zfs/zed.d/zed.rc
Note on SELinux labels:
For those keen-eyed readers, you’ll notice the file labels look good, but the user labels don’t match. Fortunately, our newly added files have the correct labels, and it’s actually our backup files that are incorrectly labeled. Since no program will need to use them, I think the risk is 0.Buuuuut if you’re a stickler for details, we can set the correct label with
restorecon:sudo restorecon -rFv /etc/zfs/zed.d/
Modify zed.rc
The zed.rc file holds the configuration for zed to notify you. In this instance, we’ll have to change the lines regarding Ntfy:
sudo -e /etc/zfs/zed.d/zed.rc
| |
Change to your settings of choice and save the file.
Restart zed
A simple reload and restart should update the systemd service:
sudo systemctl daemon-reload
sudo systemctl restart zed
Test!
I wasn’t exactly sure how to approach this, but thankfully I’m not the first person to ask this question. According to a contributor to ZFS, we can temporarily suspend all I/O to a drive to put it in a faux “failed” state. It’s apparently the same thing they do in the code tests. This should give us an alert. The commands look like the following:
zinject -d /dev/vdb -e io -T all -f 100 tank
Here we are injecting an I/O error (-e io) into the/dev/vdbdevice on the selected pool (tank). We want it to be all (-T all) types of I/O (like read and write), and with a frequency of 100% (-f 100)
This should give us some errors and a notification to ntfy:

Create the fault.

We can see the degraded state in zpool status

3 Ntfy notifications
Looks like it’s working as expected!
Clear the Error
To clear the error, we will remove the injected error:
sudo zinject -c all
sudo zpool clear tank /dev/vdb

Clearing the error puts us back to where we started.

And another notification on a clean resilver.
SMART Monitor Notifications
When I started this article, I hadn’t thought of using Ntfy for SMART notifications as well, but after going down the rabbit hole on zed, I figured: why not? How hard can it be?

The SMART Monitor does come with a daemon that can keep an eye on your drives’ health. Let’s implement the Ntfy notifications.
SMARTD Config
Open up the SMARTD config file located at /etc/smartmontools/smartd.conf. There’s loads of info in there, and more details in the man page.
Mine looks like this by default:

Default config
The documentation is pretty thorough and can give you more options. For now I’ll stick with something fairly simple. The key for us is going to be using the flags -m <nomailer> and -M exec /path/to/script
The first will tell the system to NOT use a mail system, while the second tells smartd to simply execute a file.
I will comment out the existing DEVICESCAN option and write our own:
| |
- The
-ameans we want to monitor ALL SMART properties (it is the default, but added for posterity)- The
-s (S/../.././03|L/../01/./04)section puts in place 2 self-tests - using (MM/DD/d/HH) format. The S sets a short test daily at 3AM, and the L sets a long test on the first of every month at 4AM.- The
-mand-Mare explained above. But take note of the path afterexec- I have added the
-Mflag a second time with thetestdirective. This will send us a test notification whensmartdstarts up. After our first test we will come back and remove it.
Save and close the file.
Ntfy notification file
Next, we need to create the file referenced above.
sudo -e /usr/local/sbin/smartd-ntfy
And in it will be our curl command. However, we can grab some environmental variables to give us some data. Once again, there are lots of variables you can read about in the documentation linked in the previous section. Mine looks like this:
#!/bin/bash

curl -Ls -H "Title: $SMARTD_SUBJECT" -d "$SMARTD_FAILTYPE Device: $SMARTD_DEVICE Time: $SMARTD_TFIRST Message: $SMARTD_FULLMESSAGE" http://192.168.122.198/zfs
Save and close.
Finally, we need to make it “executable”:
sudo chmod 0750 /usr/local/sbin/smartd-ntfy

This should be our final step!
SELinux users
When first putting together this article, I had ran into an issue with SELinux, but could not find in in the course of my demo, likely due to the fact that it was done on a VM without real disks.
After a host migration, I had to do this very setup again… And this time I documented where I ran into SELinux! When the notification didn’t come through, with no errors in the system logs, and the URL was double checked, I went to SELinux.
sudo sealert -a /var/log/audit/audit.log

SELinux always there to watch my back ;)
The issue is that I’m asking smartd to connect (with curl) to an external source. There are two ways to fix it.
SELinux boolean (easier)
According to the message above, we can either enable a boolean, or create a custom module. According to the screenshot, we can simply:
sudo setsebool -P nis_enabled 1
Done.
Create a custom module (slightly more advanced)
If you don’t know your way around SELinux, use the above method. Although this is arguably a better method (the best is to write our own policy). As before, you can simply follow the directions in the sealert message and copy and paste the two lines. I won’t get into why this might be a better (or worse!) way to handle the issue as it’s a bit outside the scope of this (already too lengthy) article.
sudo -i
ausearch -c 'curl' --raw | audit2allow -M my-curl
semodule -X 300 -i my-curl.pp
The first command above will give us an “interactive” super user session to run the next handful of commands as root. I prefer this so the files it creates don’t end up in my user’s home directory or wherever else I may be at the time!
Test!
If you recall, we put in the secondary -M test flag into our configuration file. Thus, simply restarting the service should both put in place our new config, and send a test notification using the script above.
sudo systemctl restart smartd
And we have a look at our Ntfy instance and we should see a test notification for each drive.

We get a notification for each drive.
Remove the test directive
If everything worked as expected, go back to your smartd.conf file above, and remove the -M test off the end. Save the file and restart the smartd.service again. Not a huge deal if you forget this step, but it will send you a notification every time the system restarts!
Troubleshooting
Sometimes things don’t always go as planned, we make typos, we forget things, maybe I even screwed something up while putting this together! I know I made plenty of mistakes while writing this article, but I try to learn from them. For the most part this should be straight forward, but if you have any issues or questions, leave me a comment below and I’ll try to reply ASAP.
SELinux Issue
Checking SELinux is a good place to start if something is not working, you are getting no warnings or errors, and you suspect it could be related to SELinux.
If you don’t know about it already, it’s a huge help to install the setroubleshoot-server package and then run:
sudo sealert -a /var/log/audit/audit.log
This will give you a nice summary of any SELinux issues, and sometimes potential ways to fix them.
Conclusion
Ntfy is my new favorite toy. I can’t wait until other applications like Home Assistant finally get onboard with UnifiedPush. Yes, this can all be done with your old school email notifications using an SMTP relay. But frankly I like how my inbox has become uncluttered, and the ntfy notifications are unintrusive. Not to mention the ease of setting them up.
As we self-host more and more apps, the more critical it is to keep track of what’s going on inside our machine(s). But instead of having to monitor dashboards, we can leverage the existing tools in Linux which do that for us. Ntfy is flexible and gives me a more modern way to get a quick bit of information and easily dismiss it if needed.
If you have any questions or comments, please feel free to leave them below. Otherwise, thank you for reading and happy self-hosting!