I have just finished a series of articles for the Smart Home Beginner website about setting up Wireguard tunnels. Two of the guides focused on setting up Wireguard as both a “server” and a “client” in Windows if you follow that model. This article is part of a short “Intermediate” level series intended to be a follow up to those articles. I hope to provide some guidance on intermediate topics and configurations. As I learn more, I will add additional articles.
Thank you for visiting my site and checking out this post! I hope you find it helpful. You may have noticed I don’t have any advertisements running (I hate how invasive online advertising has become). This also means no passive income to keep the site running. Please consider donating a small amount to say thank you and help me cover the costs.
At the time of writing this, the Wireguard Windows version is 0.3.14.
Overview
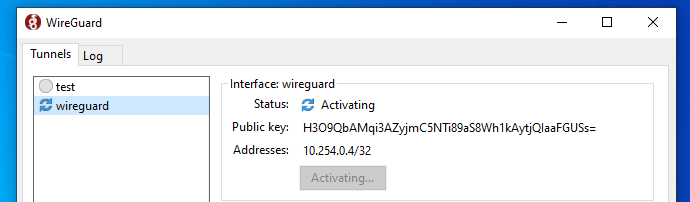
Currently, the default behavior of the Windows Wireguard program (GUI) only allows a single Wireguard tunnel to be active at a time.
As soon as we activate one, the other is deactivated!
While for the average user this is probably fine, there may be a situation when you would like to have 2 active tunnels.
Using the GUI
This piece was excluded from my beginner’s article because it involves editing the computer’s registry. That might be terrifying to some, but fortunately it’s a relatively painless process. The instructions for doing this are posted in the project’s GitHub docs.
The way the document is written indicates that in a future release, this change won’t be necessary. It appears that the program doesn’t currently check for overlapping addresses and could cause a problem if not properly configured.
Open ‘Regedit’
Begin by hitting the ‘Windows’ key and typing regedit followed by the ‘Enter’ key. This should bring up the User Account Control overlay, answer ‘Yes’.
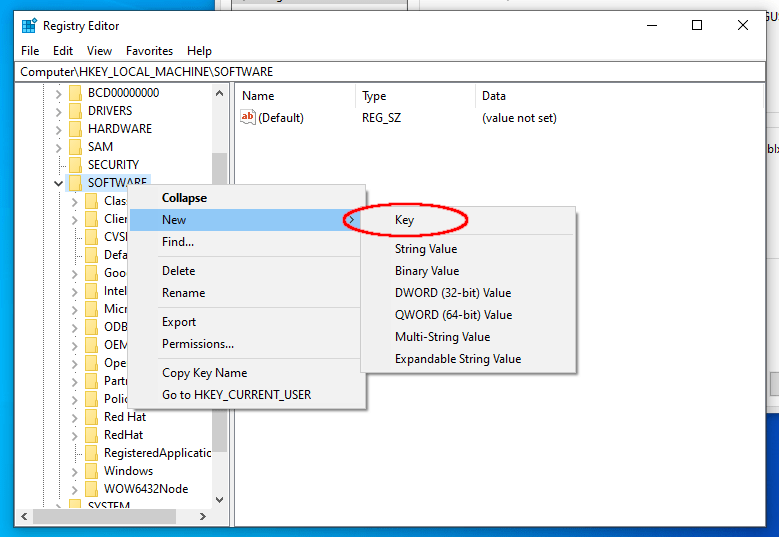
Once in the registry, we will navigate to Computer\HKEY_LOCAL_MACHINE\SOFTWARE Right click on the ‘Software’ folder and select ‘New’ –> Key:
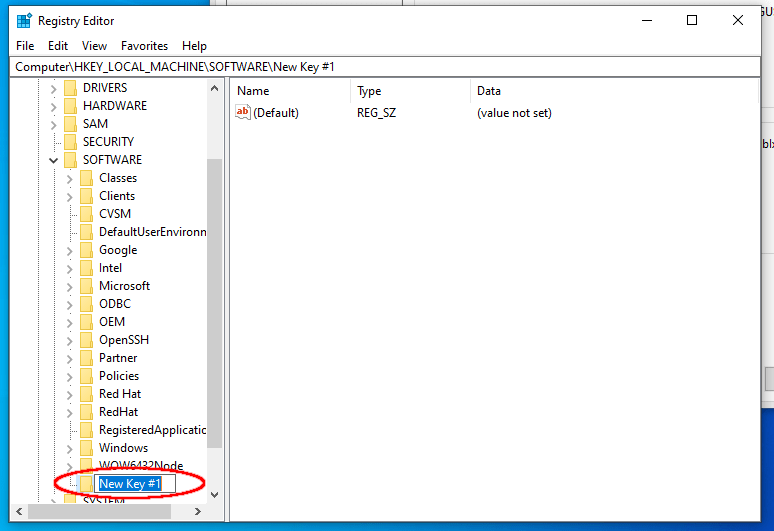
The Wireguard folder doesn’t exist, let’s create it.
Rename the Key to Wireguard.
Rename the new folder (key)
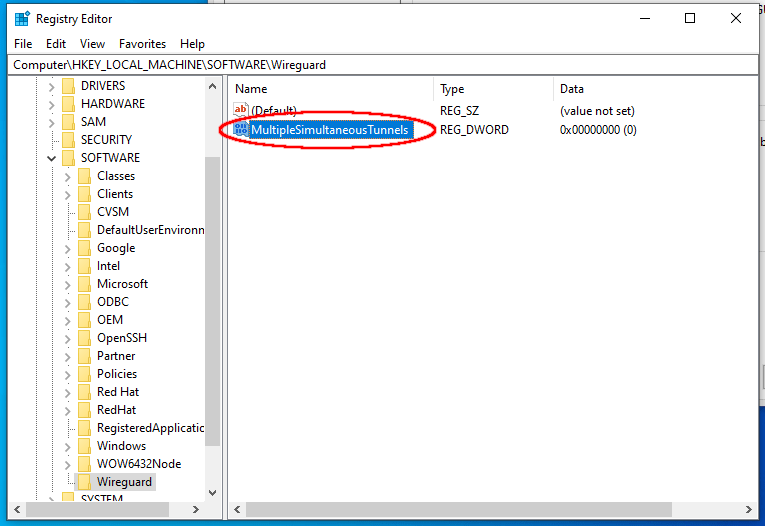
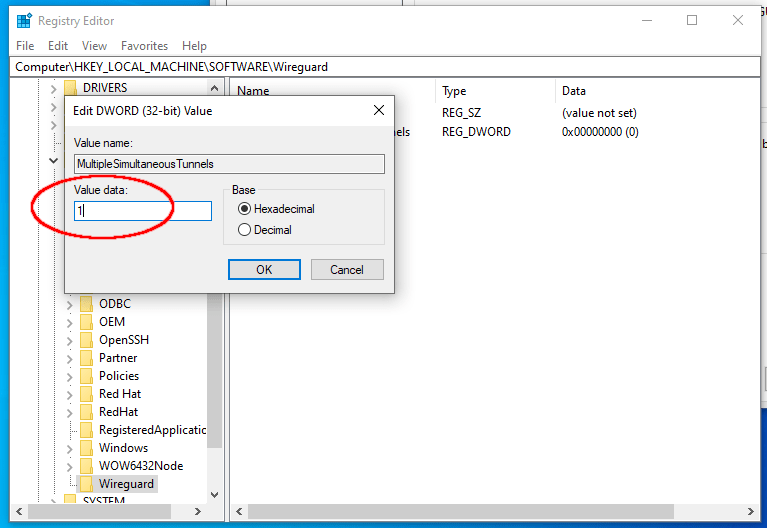
Within the ‘Wireguard’ Key, we can Right-Click, select ‘New’ –> DWORD (32-bit) Value:
Rename the new Value to MultipleSimultaneousTunnels:
Open (Double-Click) the new value and set it to 1:
Click ‘OK’.
Activate Multiple Tunnels via GUI
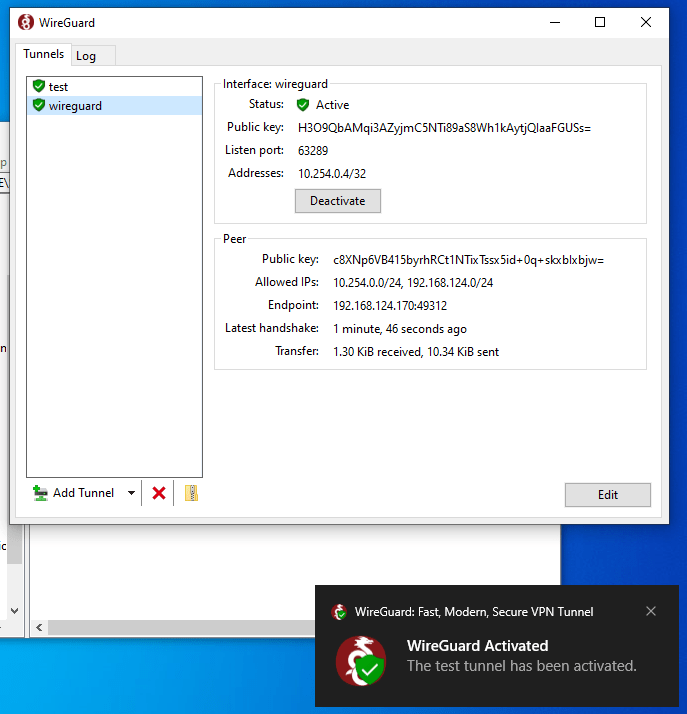
Going back to our Wireguard Windows window, we can now ‘Activate’ multiple tunnels!
Both of my tunnels are active!
Using the Command Line
Some may find it easier to work through the command line. This approach also allows us to script the events if we so wish.
Open Command Prompt as Administrator
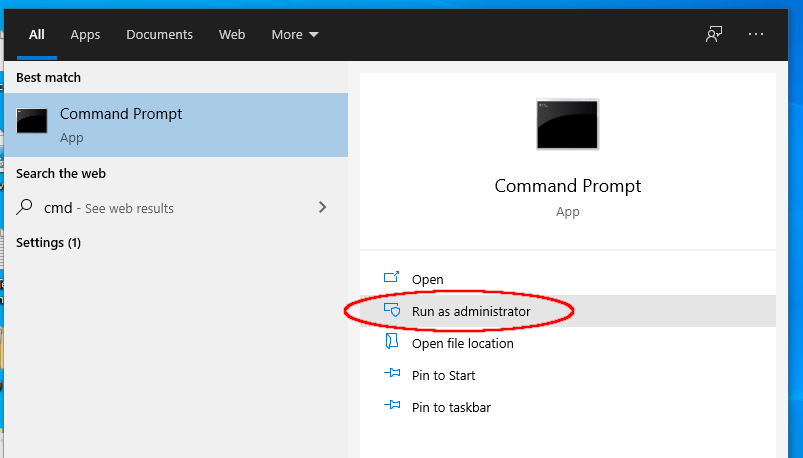
Most importantly, these commands must be run as an Administrator. Press the ‘Windows’ key or click the ‘Windows’ button in the bottom left corner of the screen, type cmd and click ‘Run as Administrator’. After the User Access Control window pops up, click ‘Yes’.
Run the Command Prompt as Administrator
Using the Included Wireguard Commands
The basic command to activate a tunnel goes as follows:
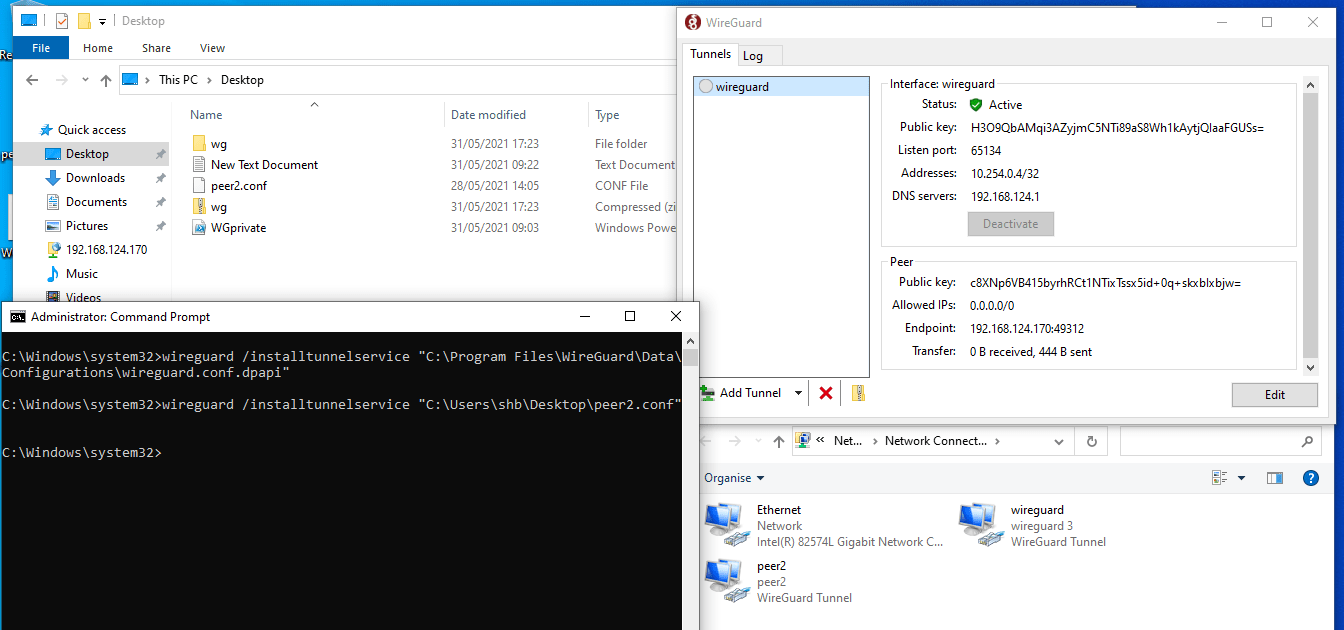
wireguard /installtunnelservice "<config file>"
Config File From the GUI
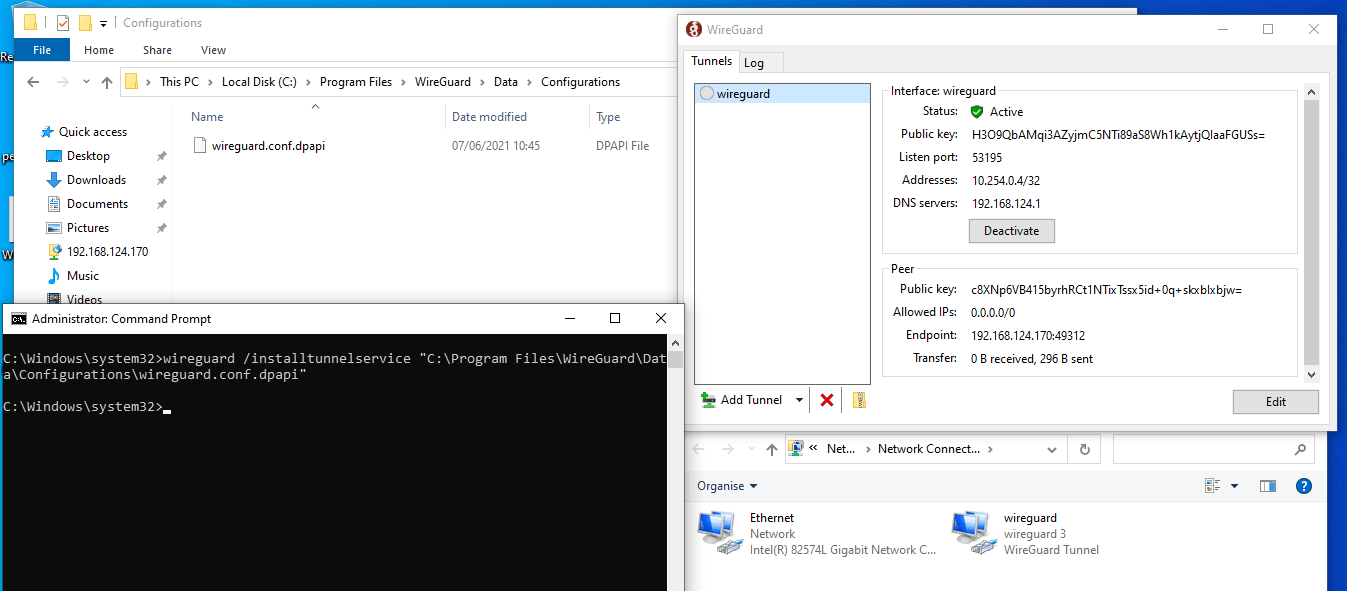
The config file can be from one of two places. If you setup the tunnel via the GUI, the config file is located in the C:\Program Files\Wireguard\Data\Configurations folder. In my example, it would look like:
Starting a Wireguard tunnel via a provided conf file.
Note:
When using a config that you generated through the GUI, the tunnel switches to ‘Active’ in the right pane of the GUI, but shows inactive in the left hand list. This allows you to activate and use another one through the GUI if needed.
There was no output in the Command Prompt to indicate success, but if we look at our Network Adapters, we can see both are up and running.
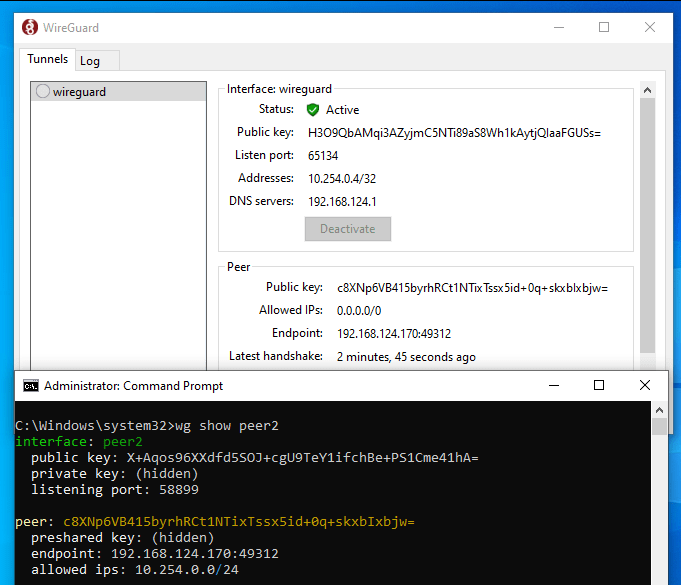
On that same note, the only way we can see the status of the tunnel we setup with the second method (peer2), is through the command line. As with Linux based installs, use the following command:
wg show "<interface name>"
This command will give a familiar output if you have used the Linux version of Wireguard and gives similar information to the GUI window.
We can see the status of our tunnels via Command Prompt the same as through the GUI.
Removing Wireguard Tunnels
Through the GUI
Deactivation through the GUI is done per normal method. Simply right-click and select ‘Toggle’ or ‘Double-Click’ or select the tunnel and click the ‘Deactivate’ button.
Through the Command Prompt
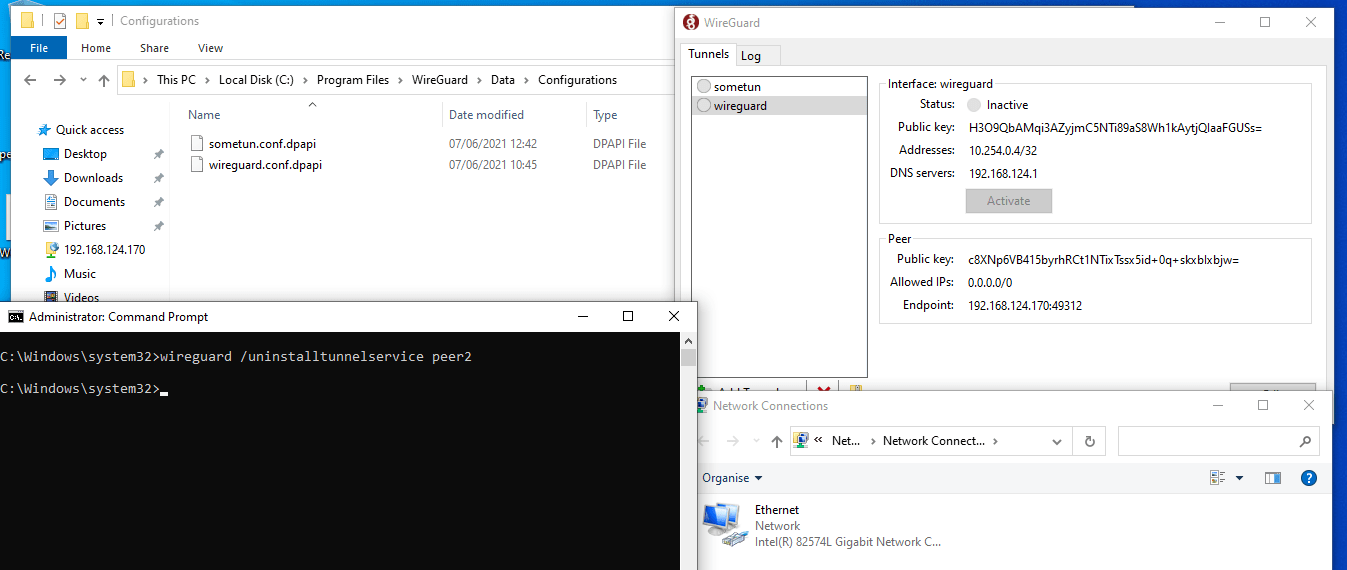
wireguard /uninstalltunnelservice <tunnel name>
In this case we don’t point to the config file, but just use the name of the tunnel itself. In my example from above, it might look like the following:
wireguard /uninstalltunnelservice peer2
Remove tunnels quickly via the Command Prompt.
Test the Tunnels
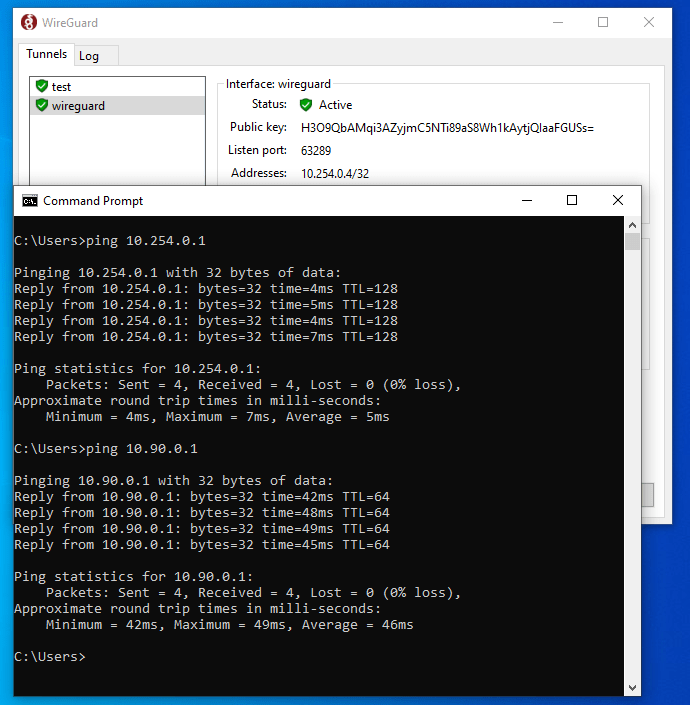
A quick test shows that both servers are reachable. In the example below I have multiple running via the GUI, but the same applies to the CLI method.
It’s always a good idea to run a quick test!
Limitations
According to the above mentioned GitHub page, one of the reasons the current behavior is to only allow a single active connection is to avoid problems caused by overlapping IP addresses. In my brief testing, overlapping addresses caused both tunnels to fail.
While the Windows Wireguard client has been written to handle everything from the average user to enterprise installations, there are a few hidden switches we can flick and knobs to turn to get it working the way we like.
Have a look at some of the scripting we can do to further tune Wireguard to work in a more hands-off manner.
Wireguard appears to be in a fairly mature state, but still the developers find ways to innovate and improve on an already great program. We look forward to where the technology will go!
Thank you for visiting my site and checking out this post! I hope you found it helpful. If you are feeling generous, please consider a small donation to help keep the server running.