Nextcloud Backup pt. 1
Table of Contents
You may have never heard it, or you may have heard it echoed 10,000 times in an online forum: Syncing solutions are not a backup solution! Nextcloud is a fantastic tool to keep your files and folders in-sync across multiple platforms, but that doesn’t mean it is “backing-up” or saving your data from catastrophic failure. It does, admittedly, have some features built-in to help mitigate accidental deletions: Trashbin and File Versioning.
There is an app for Nextcloud (available through the App hub) called NextBackup which reportedly works quite well. However, since Nextcloud version 21 the developers appear to have made a breaking change that does not allow the app to work and it is unknown when (if) it will be fixed.
Even if you have just installed your Nextcloud, it’s a good idea to implement a backup solution early and know how to use it.

Thank you for visiting my site and checking out this post! I hope you find it helpful. You may have noticed I don’t have any advertisements running (I hate how invasive online advertising has become). This also means no passive income to keep the site running. Please consider donating a small amount to say thank you and help me cover the costs.
What is a backup?
There are books written on the topic and more online articles than one cares to count. So I will keep my version simple. We want a perfect copy of all the data which we cannot replace. Example: You want a backup of your personal photos, but probably do not need a backup of your digitized film collection. While it is quite annoying to re-digitize a film, they are generally easier to find. If you have the space, go ahead and backup everything, but make the priority your irreplaceable data.
This data should be stored separately from your Nextcloud instance. Use an external hard drive, an offsite location, or even better: both. While sending your data to an offsite provider is great, they are also not immune to catastrophic failures.
In this article, we will cover a basic backup of your Nextcloud onto a local device. For more, follow along to part two of the series where we will cover some off-site options.
Restic
So let’s create a proper backup for Nextcloud using a popular new tool: restic. The following method focuses on Nextcloud, but could really be used for any application. There are other options such as borg and duplicati among others. To be honest, all are great options and the most important at this point is to MAKE A BACKUP.
I don’t have experience with the latter two, but from a quick search, they accomplish more or less the same task in slightly different ways.
Restic is a great tool that works quickly and efficiently. One of the ways to increase its efficiency is by using “snapshots”. After your first backup, Restic creates an index of the files in the backup repository. If you change a few files with Nextcloud, the next Restic backup begins by looking at the old index. It then performs the next backup “snapshot” by only uploading the changed files. This greatly reduces space needed for a backup and time taken for subsequent backups!
Installing and Updating Restic
This article is written on a Debian 10 server, but the same applies for an Ubuntu server. CentOS and others can easily be adapted. For this first part, Restic must run using sudo to ensure access to files and directories owned by different users. Part 2 in the series will include a way around this. But for now, let’s begin:
$ sudo apt update && sudo apt install restic
$ sudo restic self-update
Note:
As of writing this, the restic .deb repository has version 0.9.6, but with the self-update, it quickly moves to the most up-to-date version (0.12.1).Initialize a Restic Repository
Let’s create a directory to hold our Restic repository. This could be created, for example, on an external drive as well:
$ sudo mkdir /srv/nc-backup
To actually create a Restic repository, we use the following restic command to initiate a new repository at the location of our newly created directory:
$ sudo restic init -r /srv/nc-backup
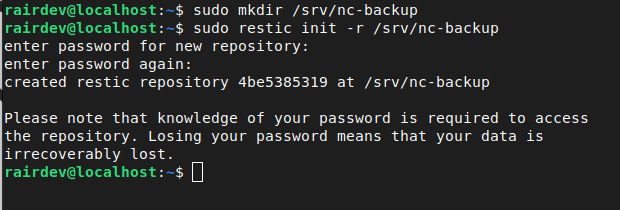
Create our Restic repository
Important: Restic asks for a password; I recommend using a secure random password of 20-30 characters. This can be saved in a password manager like VaultWarden or KeePassXC, and will be used to encrypt our backup.
Now that Restic is setup, let’s prepare Nextcloud for a full backup.
Nextcloud Maintenance Mode
Before we start to do things in the background, it’s generally advised to put your Nextcloud into “Maintenance Mode”. This effectively puts your instance on “pause”. From this point forward, we will keep it “ON” to prevent any further changes to the database while we are performing the backup.
$ docker exec -u www-data nextcloud php occ maintenance:mode --on
Note: Replace nextcloud; with your Nextcloud container name$ sudo -u www-data php /var/www/html/occ maintenance:mode --on
Note: Replace /var/www/html/occ with your actual path to Nextcloud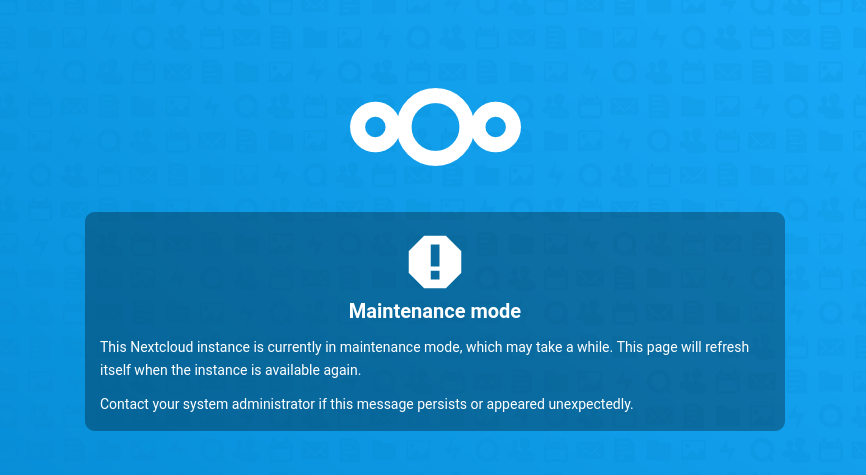
Nextcloud is now in maintenance mode to prevent changes in the background.
Backup our Nextcloud Database
We begin by creating a directory to hold the “database dumps”:
$ docker exec -u mysql nextcloud-db mkdir -m 750 /var/lib/mysql/backup
Note: Replacenextcloud-dbwith the name of your Nextcloud database container.
Update Sept. 15, 2021: While continuing the series of articles, I noticed we were leaving the directory world readable. For a small amount of added security, we create the directory with the-m 750switch to remove access to ‘other’ users.
$ sudo mkdir -m 750 /var/lib/mysql/backup
Note: This folder could really be anywhere, but for simplicity I keep it in the same directory.
Update Sept. 15, 2021: While continuing the series of articles, I noticed we were leaving the directory world readable. For a small amount of added security, we create the directory with the-m 750switch to remove access to ‘other’ users.
Now let’s actually dump the database. I have provided a few examples below depending on your setup. There’s no way I could include them all, so please let me know if I missed a popular choice and I will add it! The following are for MariaDB (and MySQL but I haven’t tested it).
$ docker exec -u mysql nextcloud-db bash -c 'umask 007 && mysqldump --single-transaction -u nextcloud \
-p`cat "$MYSQL_PASSWORD_FILE"` nextcloud > \
/var/lib/mysql/backup/nextcloud-sqlbkp_`date +"%Y%m%d"`.bak'
Note: Replace
nextcloud-dbwith the name of your Nextcloud database container. Using docker secrets is a good security practice, but definitely adds a bit of complexity to the above command.
- We need to begin our
docker execcommand withbash -cso that it correctly reads the following environment variable (starts with a$).- The
single-transactionflag ensures that nothing else is written during the dump.-uindicates the database user which can also be loaded from an environment variable.-pis the password which we read from the secrets file.nextcloud; is the name of our database.- The final piece says that we push the data into a
.bakfile which is tagged with today’s date.Update Sept. 15, 2021: While continuing the series of articles, I noticed we were leaving the database backups world readable. For a small amount of added security, we run the command as the
mysqluser and start the command withumask 007which removes the ability of ‘other’ users to read the database file.
$ docker exec -u mysql nextcloud-db bash -c 'umask 007 && mysqldump --single-transaction -u nextcloud \
-p$MYSQL_PASSWORD nextcloud > /var/lib/mysql/backup/nextcloud-sqlbkp_`date +"%Y%m%d"`.bak'
Note: Replace
nextcloud-dbwith the name of your Nextcloud database container.
- We need to begin our
docker execcommand withbash -cso that it will correctly read the following environment variable (starts with a $).- The
single-transactionflag ensures that nothing else is written during the dump.-uIndicates the database user which can also be loaded from an environment variable.-pis the password which we will read from the environment variable.nextcloudis the name of our database.- The final piece says that we will push the data into a
.bakfile which is tagged with today’s date.Update Sept. 15, 2021: While continuing the series of articles, I noticed we were leaving the database backups world readable. For a small amount of added security, we run the command as the
mysqluser and start the command withumask 007which removes the ability of ‘other’ users to read the database file.
$ sudo mysqldump --single-transaction -u nextcloud -pMYSECRETPASSWORD \
nextcloud > /var/lib/mysql/backup/nextcloud-sqlbkp_`date +"%Y%m%d"`.bak
Note: Replace the string after
-pwith your database password. This can also be read from an environmental variable like$MY_SECRET_PASSWORD
- The
mysqldumpcommand is included with MariaDB and may need to be run as themysqluser. This would be accomplished by replacingsudowithsudo -u mysql.- The
single-transactionflag ensures that nothing else is written during the dump.-uIndicates the database user which can also be loaded from an environment variable.-pis the password (see above)nextcloudis the name of our database.- The final piece says that we will push the data into a
.bakfile which is tagged with today’s date.
If everything worked correctly you won’t get any output on screen. Take a look in the directory to make sure the backup file is there, labeled correctly, and has a size greater than 0.
Restic to backup Nextcloud files and DB
For simplicity (and ease of a full working restore), we will backup the entire Nextcloud directory and the database dump file we just created above. This part could not be simpler:
$ sudo restic backup -r /srv/nc-backup /opt/volumes/nextcloud/
$ sudo restic backup -r /srv/nc-backup /opt/volumes/nextcloud-db/backup
Note: Replace
/opt/volumes/nextcloudand/opt/volumes/nextcloud-db/backupwith the directories of your Nextcloud app and database respectively.
- The commands must be run as root (unless your user has access to the files and directories in question).
- The
-rswitch tells Restic which repository to use. We can have multiple if so desired.- The final piece of the command tells Restic which directory we wish to add to our repository.
For Docker setups this is where you mount your volumes. If you are not using “bind” mounted volumes (shown above), and instead have opted for “named” volumes or random volumes, I highly suggest switching to a “bind” mounted volumes to reduce chances of data loss!
$ sudo restic backup -r /srv/nc-backup /var/www/html
$ sudo restic backup -r /srv/nc-backup /var/lib/mysql/backup
Note: Once again remember to replace the above with the correct directories.
- The commands must be run as root (unless your user has access to the files and directories in question).
- The
-rswitch tells Restic which repository to use. We can have multiple if so desired.- The final piece of the command tells Restic which directory we wish to add to our repository.
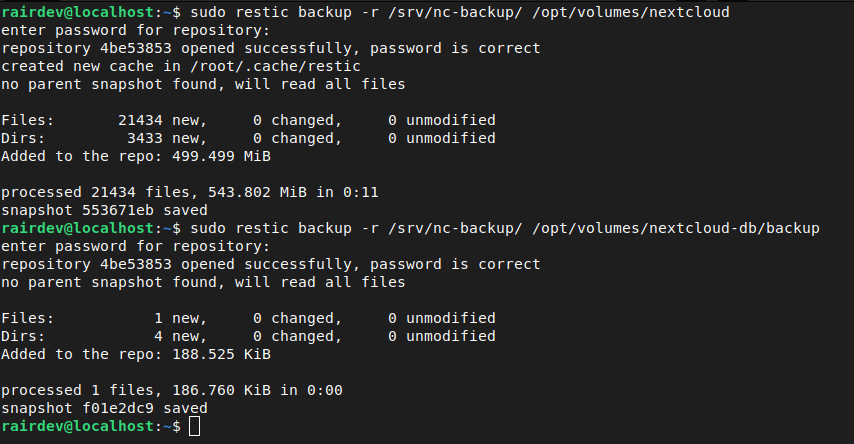
Restic backup of Nextcloud directory and database complete!
After entering each command above, the repository will open, ask you for your password you set when initializing the repository, and begin reading the data. Restic will then create a cache file to store information about the backup, and create a snapshot of the data. And that’s it! Backup is successfully completed.
Reminder: You must disable maintenance mode in Nextcloud after finishing your backup. The command is exactly the same as above, but just change the last switch to --off.Useful Restic Commands
We can see the status of our backup with the following set of commands:
restic stats– a quick overview of the statistics about your repositoryrestic check– a quick integrity check to make sure there are no errors in your repositoryrestic snapshots– a view of your individual backups, and one of the most useful features
Small Security Note
Update Sept. 15, 2021: While continuing the series of articles, I noticed we could add a small amount of security to this process. After successfully backing up our database file, you might want to delete the backup to also save some space on your drive. As each file is backed up to your Restic repository, there is little need to keep each iteration on your server.
Put your Nextcloud backup to the test!
But wait… a backup is only as valuable as its ability to actually restore the data in question!! So let’s do a little verification check.
“Oops! I deleted my favorite Nextcloud folder! My Nextcloud broke after upgrading to version X! My Nextcloud is corrupted!"
— Every user at some point
Fear not fellow backup aficionado! Let’s have a look at how we can restore data to our Nextcloud using the Restic backup with two scenarios: a complete restore, and restoring a particular directory.
For the sake of the following example, I will delete the Documents folder from a basic default Nextcloud installation:
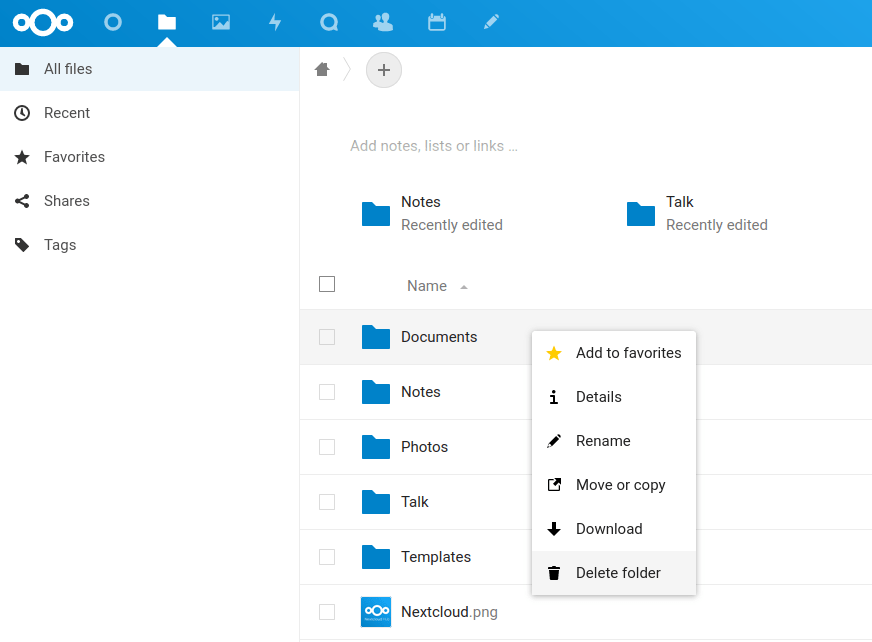
Deleting an important folder.
And for good measure, let’s permanently delete it from the trashbin.
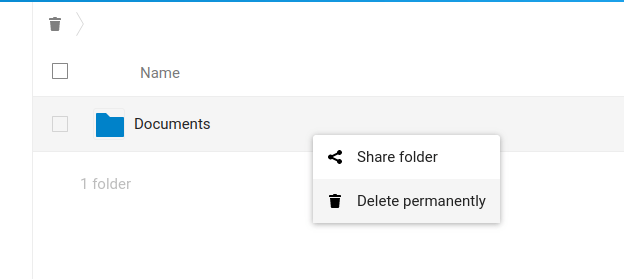
Oops! Permanently deleted!!
Completely Restore Nextcloud Backup
For this, we will follow along with the suggested steps in the Nextcloud documentation. Once again, let’s turn maintenance mode “on”. This prevents any issues during our restoration.
The first step is to restore a backup from one of our Restic snapshots. Let’s find which one we want to use:
$ sudo restic snapshots -r /srv/nc-backup
Note: This shows us a list of all our snapshots in the /srv/nc-backup repository.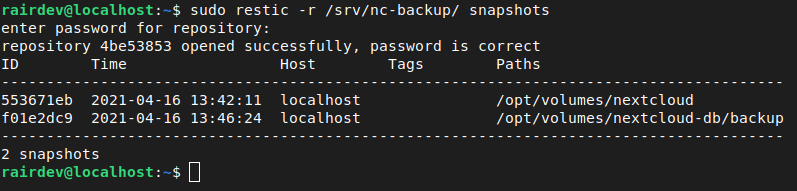
A view of our Restic snapshots.
In this case we only have one snapshot, so we take note of “ID” –> 553671eb. In this article, I cover just one of a few ways to accomplish this next step. We create a directory separate from our original installation to restore everything to.
$ sudo mkdir /tmp/nc-restore
Note: For a large installation you would need enough free space on the disk to accomplish this. We use the /tmp directory as a temporary location - it will be deleted automatically upon a server reboot.And now to restore the snapshot to our newly created directory:
$ sudo restic restore 553671eb -r /srv/nc-backup --target /tmp/nc-restore
Note: Replace with your snapshot ID, and notice how we are using --target to tell Restic WHERE to put the files
Successful restore of our files.
Now that we have unpacked the entire backup, we can either search the directory for our missing files, or we can copy everything over using a tool such as rsync:
$ sudo rsync -Aax /tmp/nc-restore/opt/volumes/nextcloud /opt/volumes/nextcloud
Note: Replace the first directory string with your restored backup, and the second with the location of your mounted Nextcloud volume.
For a look at why we are using the
-Aaxswitches, have a look at thersyncmanual. The short version is that they tellrsyncto recursively (full directory depth) replace the files and preserve permissions.
$ sudo rsync -Aax /tmp/nc-restore/var/www/html /var/www/html
Note: Ensure the directories are correct for your installation.
For a look at why we are using the
-Aaxswitches, have a look at thersyncmanual. The short version is that they tellrsyncto recursively (full directory depth) replace the files and preserve permissions.
Ok, so we are only halfway there. If the original backup was made while maintenance mode was not on, it could have popped your Nextcloud out of maintenance mode. I suggest refreshing your Nextcloud page in the browser to confirm we are still in maintenance mode. Next comes the scary part: we must drop (read: delete) the old database first before we can restore from the backup. If you are restoring an old backup or are unsure of the quality of your backup, make another dump of the current database!!!
Nextcloud Database Restore
The first thing to do is to copy the database dump (.bak) file into our database directory for easier access. This is especially critical for docker installations, and simply easier to find on bare metal. Follow the same steps above to recover your database file from the snapshot we took of the database directory. Once the file is in place, we can continue.
The following commands in succession:
- DROP (delete) our existing database
- CREATE a new blank one to be filled
- Fill it from our
.bakdump file:
$ docker exec nextcloud-db bash -c 'mysql -u nextcloud -p`cat "$MYSQL_PASSWORD_FILE"` \
-e "DROP DATABASE nextcloud"'
This should be familiar to the command earlier in this article. The main difference is we are now using the -e switch to execute the DROP command.
$ docker exec nextcloud-db bash -c 'mysql -u nextcloud -p`cat "$MYSQL_PASSWORD_FILE"` \
-e "CREATE DATABASE nextcloud"'
This creates the new nextcloud database.
$ docker exec nextcloud-db bash -c 'mysql -u nextcloud -p`cat "$MYSQL_PASSWORD_FILE"` \
nextcloud < /var/lib/mysql/nextcloud-sqlbkp_20210416.bak'
Here we are reading in the data from our .bak file into our newly created blank database.
Note: Replace nextcloud-sqlbkp_20210416.bak with the name of your desired restore file.$ docker exec nextcloud-db bash -c 'mysql -u nextcloud -p$MYSQL_PASSWORD \
-e "DROP DATABASE nextcloud"'
This should be familiar to the command earlier in this article. The main difference is we are now using the -e switch to execute the DROP command.
$ docker exec nextcloud-db bash -c 'mysql -u nextcloud -p$MYSQL_PASSWORD \
-e "CREATE DATABASE nextcloud"'
This creates the new nextcloud database.
$ docker exec nextcloud-db bash -c 'mysql -u nextcloud -p$MYSQL_PASSWORD \
nextcloud < /var/lib/mysql/nextcloud-sqlbkp_20210416.bak'
Here we are reading in the data from our .bak file into our newly created blank database.
Note: Replace nextcloud-sqlbkp_20210416.bak with the name of your desired restore file.$ sudo mysql -u nextcloud -pMYSECRETPASSWORD -e "DROP DATABASE nextcloud"
This should be familiar to the command earlier in this article. The main difference is we are now using the -e switch to execute the DROP command.
Note: Replace MYSECRETPASSWORD with your password.$ sudo mysql -u nextcloud -pMYSECRETPASSWORD -e "CREATE DATABASE nextcloud"
This creates the new nextcloud database.
$ sudo mysql -u nextcloud -pMYSECRETPASSWORD \
nextcloud < /var/lib/mysql/nextcloud-sqlbkp_20210416.bak
Here we are reading in the data from our .bak file into our newly created blank database.
Note: Replace nextcloud-sqlbkp_20210416.bak with the name of your desired restore file.Phew! Stressful part is finished. I wasn’t given any output after each command above, but you might see an “OK”. The final steps are to turn off maintenance mode and set an option in Nextcloud that tells all of our Nextcloud clients (desktop, mobile, etc.) to look for a change in the file system.
Nextcloud ‘data-fingerprint’
According to the Nextcloud Documentation:
“After restoring a backup of your data directory or the database, you should always call maintenance:data-fingerprint once. This changes the ETag for all files in the communication with sync clients, allowing them to realize a file was modified."
—https://docs.nextcloud.com/server/stable/admin_manual/configuration_server/occ_command.html#maintenance-commands
$ docker exec -u www-data nextcloud php occ maintenance:data-fingerprint
$ sudo -u www-data php /var/www/html/occ maintenance:data-fingerprint
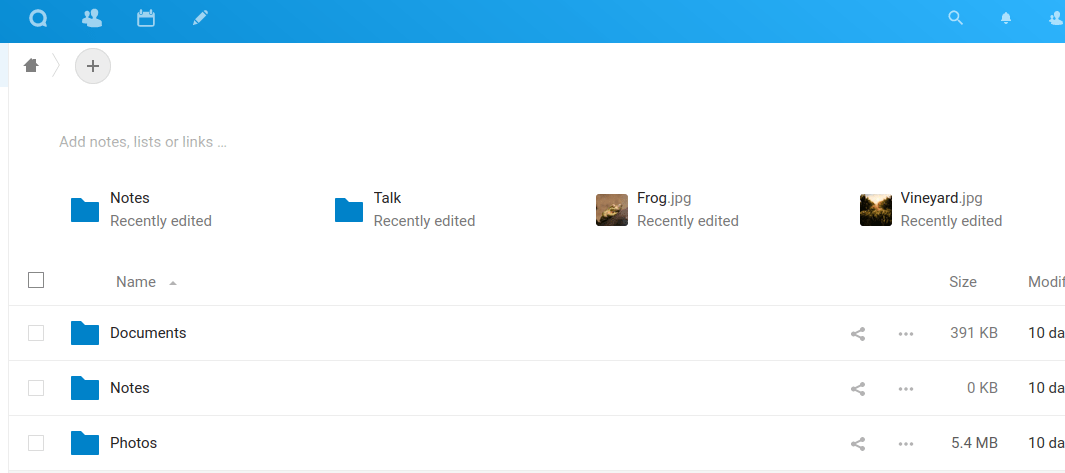
And the directory is back! Great success.
Restore specific files or directories only
Here we have a few options which I will not cover in as deep of detail since most can be deduced from the above steps. The key differences are how we might find a specific file or directory, and how we go about restoring it. In the above example, we restored the entire Nextcloud app, data, and database. Let’s explore a few other options for Restic:
restic find Documents– this command allows us to find the exact directory path to the item we wish to restore. To restore only the Documents folder, we can include the following switch in ourrestic restorecommand (shortened for the example):
$ sudo restic restore ... --include /path/to/my/Documents
restic mount– this command will mount your snapshot(s) to be viewed as if they are a mounted external drive. More information in the official documentation.
Besides rsync (usually the better option) we can also use cp -a to move files back and retain their attributes:
$ sudo cp -a /tmp/nc-restore/opt/volumes/nextcloud/data/user/files/Documents \
/opt/volumes/nextcloud/data/user/files/
Inform Nextcloud of file system changes
Once we have returned the files to the correct user directory, we need to let Nextcloud know that something has changed. We do that with another occ command:
$ docker exec -u www-data nextcloud php occ files:scan user
Note: Replacenextcloudwith the name of your container anduserwith the name of your user. Alternatively, you can usefiles:scan --all.
$ sudo -u www-data php /var/www/html/occ files:scan user
Note: Replacenextcloudwith the name of your container anduserwith the name of your user. Alternatively, you can usefiles:scan --all.
Frequently Asked Questions (FAQ)
What is a ‘database dump’?
Why doesn’t Nextcloud see my replaced files?
occ command shown above.My Nextcloud is still not working, what should I do?
These generic questions are always hard to answer. Start by checking out the Nextcloud logs. Also be aware of a helpful set of occ maintenance commands:
maintenance:repair- Run automatically during upgrades, it can help to repair a damaged database.maintenance:update:htaccess- Usually unnecessary, but can help with odd permissions problems.maintenance:data-fingerprint- documented above.
Conclusion
In this article I walked you through the importance of making a proper backup of your data and how it differs from a syncing solution like Nextcloud. We also looked at Restic as a tool to easily and efficiently create a full backup for us. Finally we restored a “broken” Nextcloud installation from a Restic snapshot.
This is just the first step in backups. Regular backups and keeping them in more than a single location are critical for your most valuable files. How you make that backup and the tool you use is not as critical as making the backup itself. But keep in mind that it should be verifiable! There’s no use in a backup if you can’t actually restore data from it!
Thus far I have been satisfied with the results of Restic as a backup solution. On that note, before you start to play with your working Nextcloud application, MAKE A BACKUP!
Next Steps (preview of pt. 2 in the series)
This first part of the series has been a simple start to make sure you have a good backup of your Nextcloud instance and know how to restore it properly. However, there’s a good deal of improvement and automation we can do to modify the above steps. Here’s a quick preview of what I will cover in the next article:
- Use an s3 off-site bucket (Wasabi, Backblaze, Amazon, other)
- Using an environmental file to read in some repetitive variables for Restic
- Using
--exclude-fileand--files-fromflags with theresticcommand to simplify backups and reduce their size. - Rotate our database and Restic backups
Next in this series:
Nextcloud Backup pt. 2
Thank you for visiting my site and checking out this post! I hope you found it helpful. If you are feeling generous, please consider a small donation to help keep the server running.