Nextcloud 21 PHP 8 With Docker
Table of Contents
One of the highlights from the Nextcloud 21 release in February, 2021 was the compatibility with, and performance bump of PHP 8.0. Unfortunately, the official Nextcloud image is still using PHP 7.4. WTF?
Update August 23, 2021:
The Nextcloud team have officially made the switch to recommending PHP 8 and have updated their base images to use it as the default. This article is no longer relevant in that regard, but could provide an interesting learning opportunity for those wanting to dive into a Dockerfile.
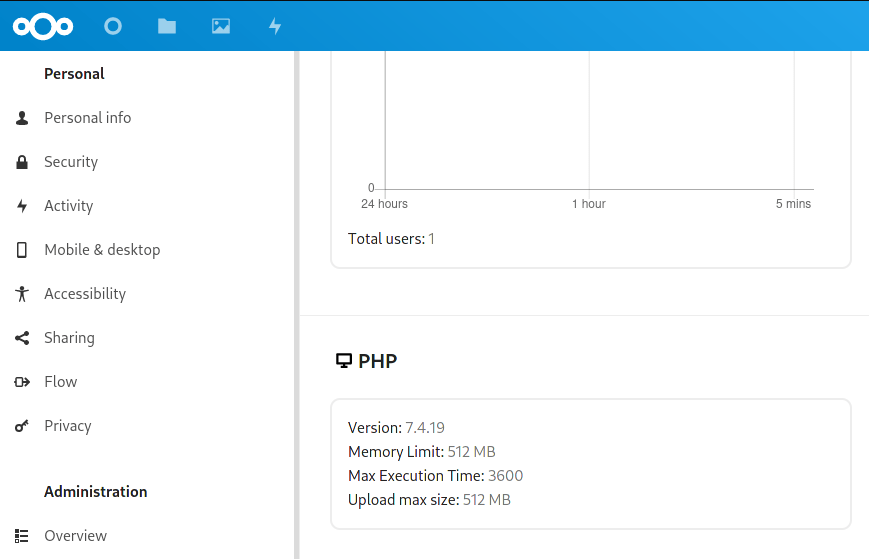
Nextcloud 21+ still based upon PHP 7.4

Thank you for visiting my site and checking out this post! I hope you find it helpful. You may have noticed I don’t have any advertisements running (I hate how invasive online advertising has become). This also means no passive income to keep the site running. Please consider donating a small amount to say thank you and help me cover the costs.
Most of us self-hosters would agree that managing applications with Docker images is extremely helpful as it allows us to let the application’s developers deal with dependencies. It also has the benefit of not running into package conflicts within the same server. This also appears to be the case with the decision to stick to PHP 7.4 in the official image. Nextcloud is giving the developers of Nextcloud Apps time to catch up and get everything PHP 8.0 compatible.
The good news is, more and more apps have added support for PHP 8. I can’t speak to specific speed improvements, but so far it is feeling rather snappy! To enable PHP 8.0, we have to go through a few steps. Let’s have a look:
Note:
Through my non-comprehensive testing, the basic apps all appear to have PHP 8.0 support.The only one I regularly use that does not work with PHP 8.0 is Maps (which already has issues with 7.4), and hasn’t been updated since Oct. 2020. There are some nightly builds, so I expect to see an official update soon.Maps has since been updated.
Prerequisites
- Docker
- Docker-compose
- Make a backup
Overview
Like most of us using Nextcloud with Docker, we normally just pull the most updated image and run it, either stand-alone or with docker-compose. These images are built by the Nextcloud team so that we can use them with a single command line. The good news is that as this is open source software, we have access to the build image and can modify it to our liking. If you are unfamiliar with modifying Dockerfiles, this might be a good place to start.
Pull the Nextcloud Dockerfile and supporting files
We begin by using the official Nextcloud GitHub repository. First, we clone (make a local copy of) the code repository to grab the handful of files needed to build a customized version of the Nextcloud image:
git clone https://github.com/nextcloud/docker
This creates a directory named docker with the required files. I recommend creating this outside of your normal docker directory if you have docker-compose files, secrets, config files, etc.Now that we have a copy of the repository, let’s find the Dockerfile that is used to build the official image. For this article, I will be modifying the Apache image, but it should be fine if you are using the FPM one instead. Navigate to the following:
cd ./docker/21.0/apache/
If we have a look inside the directory we will see the following files:
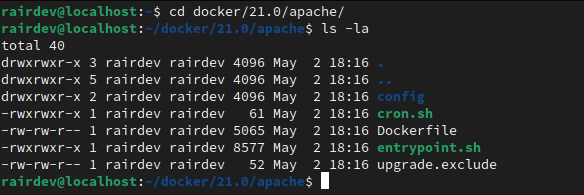
Necessary files for building a Nextcloud Docker image.
If you decide to dive into the contents of the Dockerfile (which I recommend you do at some point), you will see that the files included in this directory give Nextcloud some base config files, as well as shell scripts for running the container.
Modifying the Dockerfile
Let’s begin by having a quick look at the Dockerfile. Use any editor you like:
| |
We can see the first line specifically tells us not to modify the file since it was automatically generated from a template. You are welcome to modify theupdate.shscript at the top level of the repository and run it to generate a newDockerfileinstead.
A Dockerfile is generally built from a base image which usually stems from a Linux distribution. Here we can see that the Nextcloud Dockerfile is built on top of the PHP 7.4-apache-buster image. This tells us that it originated from Debian (Buster), and then includes the required packages to run a basic PHP 7.4 installation with an Apache webserver.
If we take a look at the PHP Docker images on Docker Hub, we can see there is an updated version of this image. So let’s simply change the Dockerfile to use the new version of PHP as the base image and build the Nextcloud image on top!
| |
Build the Image
These days I assume if you are this far into an article like this, you are using docker-compose to manage your docker containers. To simplify our process and reduce errors later, we will instead build the image with a base docker build command and tag it with something unique. This will make it easier to put back into our compose file, especially if you are using multiple Nextcloud containers like cron or the high-performance backend.
$ sudo docker build --tag=nextcloud:php8 .
Note how we are giving it a unique tag (so it doesn’t revert to “latest”) and note the “.” at the end of the command. The period indicates we will be building from the Dockerfile in this directory.If you’ve never built an image before, be patient. It will take a while as it must download all of the components and install them.
Failure!
Update June 17, 2021:
The errant package (php_imagick) has now been updated to v3.5.0 which provides support for PHP 8. The below error should no longer occur. Skip ahead!
Oh no! It looks like the image failed to build. Let’s investigate why…
Hmmmm… these things happen when tweaking and trying new things.
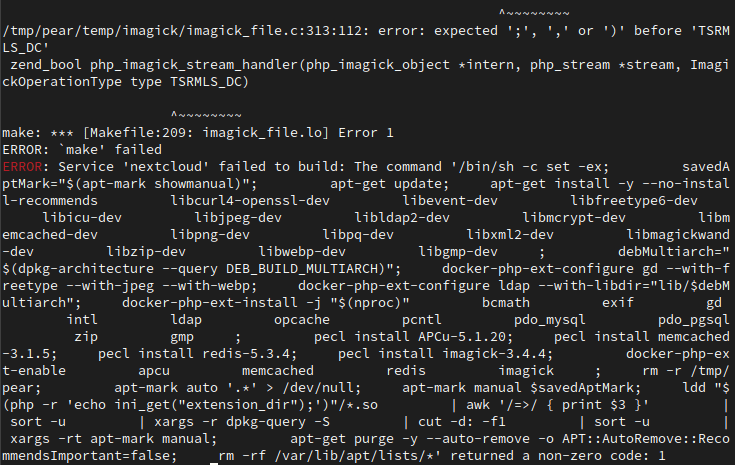
We failed while installing the imagick-3.4.4 package. If we scroll up the output, we can see the command (in red below) last run in the Dockerfile that caused it to fail:
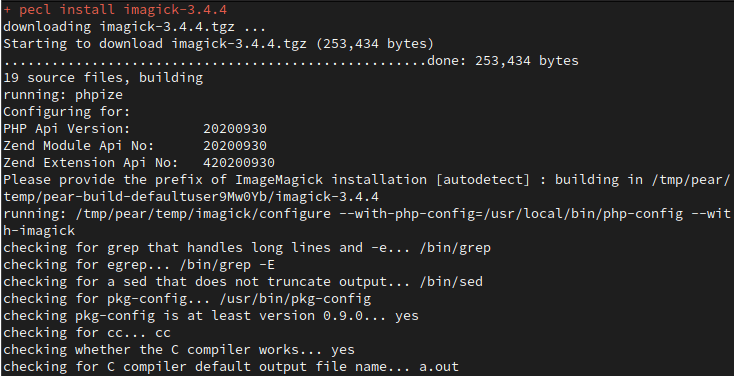
Scrolling up shows the last command run (in red) before our Error.
A little investigation shows us that since the pecl imagick package hasn’t been updated in nearly 2 years, there are some compatibility issues. Fortunately the developer was quick to respond and the package was updated in the main branch. However, it cannot be installed directly through the pecl command as before. So we must build it manually from the GitHub repo.
Modifying the Dockerfile Round 2!
Let’s re-open the Dockerfile and look at where we are installing the imagick package:
| |
Let’s comment out the two imagick lines, and add in a few lines to grab the updated package thanks to this comment.
| |
Note: Here we have added a directory for the updatedimagickmodule, grabbed it from GitHub, pulled it from the archive, and installed it with thedocker-php-ext-installscript.
Rebuild the Image
Repeat the build command from above. We might get some warnings about deprecated (old and no longer used) pieces of code, but the image should build successfully:
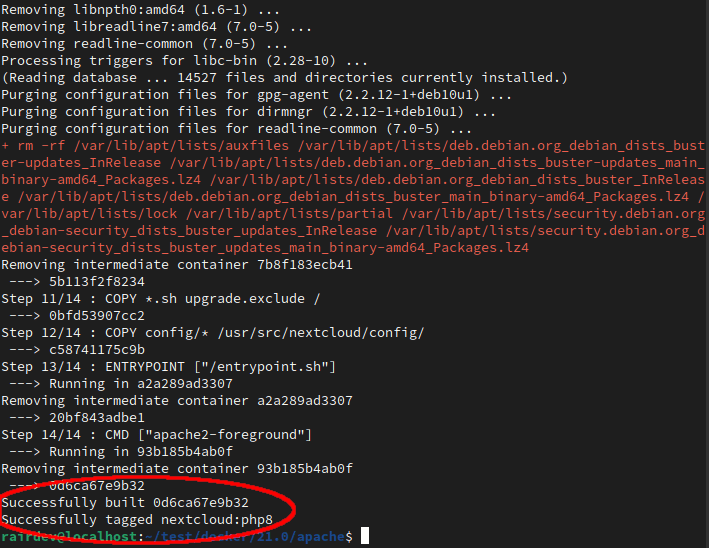
Successful Dockerfile build!
Run our PHP 8 Nextcloud image!
If you have the luxury to test the image locally with docker run, I would recommend it just to be sure everything starts properly. Afterwards, like me, you are probably using docker-compose. We can simply change the image name to our newly tagged image we just built:
version: "3.7"

services:
  nextcloud:
    image: nextcloud:php8
...
If you did not pre-build the image above, you can also build it from the docker-compose file. We just need to replace the images: tag with build:, and give it the location of the Dockerfile.
version: "3.7"

services:
  nextcloud:
    build: ./docker/21.0/apache
...
...
  nextcloud-cron:
    image: myproject_nextcloud:latest
...
Note:
Image tags will not work the same for other instances of the container - it defaults to:directoryname_filename:latest. So if your file is namednextcloud.ymland is located in a directory namedmyproject, yourcroncontainer, would use image:myproject_nextcloud:latestas shown above.
Bring up your Nextcloud container(s) and have a look again in your Settings –> Administration –> System. You should now see it is running PHP 8!

PHP 8 in Nextcloud Docker
Conclusion
More and more apps for Nextcloud are taking advantage of the new PHP 8.0 language. PHP 8.0 is also developing nicely as it’s already at v8.0.6 as of writing this article. The stability of it makes it a nice candidate for an update to your Nextcloud instance.
I hope you found this tutorial helpful as I guided you through some of the debugging process I use when testing out new software and tweaks. I haven’t been using Nextcloud with PHP 8.0 long enough to give a definitive answer about the performance improvements or stability, but I am happy with the results.
Thank you for visiting my site and checking out this post! I hope you found it helpful. If you are feeling generous, please consider a small donation to help keep the server running.